
How to shoot Twilight – Lights In Motion
Moving lights provide fantastic opportunities for photographers to get creative with shutter speeds and create an endless variety of effects. Most of us live within easy reach of an endless stream of moving lights in the shape of a main road or motorway. By setting up your camera on a tripod and leaving the shutter open, their lights will record as streaks of coloured lines – headlights being yellow and tail lights being red.

The M25 never looked so pretty! Shot from a footbridge at sunset, while
there was still colour in the sky. Had the picture been taken later when
the sky was dark it would have been less successful. Nikon D2x, Sigma
10-20mm, 30 secs at f/16. ©Tim Gartside
For best results find a viewpoint that will enable you to see traffic going in both directions so you record both colours. Make sure the traffic is free-flowing – try to avoid junctions where traffic may stop for a while. Shooting with traffic coming towards and away from you will generally make a more interesting shot than traffic going left and right. A high viewpoint, such as a bridge or an upper floor window, will also help. Again, shoot before it gets completely dark so you record some detail in the scene other than the lights, and if you can find a viewpoint that provides an interesting backdrop, such as a landmark building, so much the better.
Set a shutter speed between 10 and 30 seconds, depending on the light, the speed of traffic and your composition.
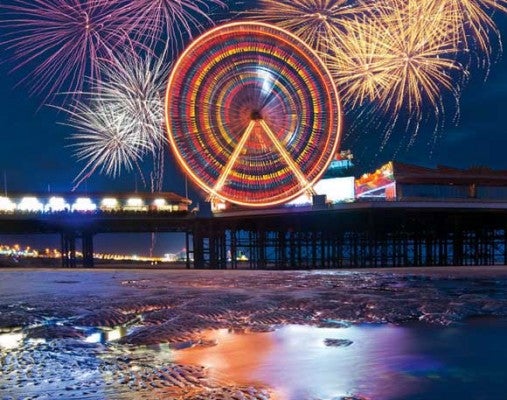
For a more dynamic alternative to traffic trails head to the nearest funfair. They’re always extravagantly lit and the motion of attractions such as the ferris wheel makes a great subject.
Long shutter speeds will enable you to record the rotating lights as a continuous blur.

The ferris wheel on Blackpool Pier at dusk, photographed both moving and
stationary. Both shots are different though equally effective. Nikon
D2x, Sigma 10-20mm, ISO 100. ©Tim Gartside
An alternative approach to shooting traffic trails is to be in a moving car yourself. Make sure someone else is driving, though! You can attach your camera to the dashboard or front windscreen using a clamp or suction cup. Or you can attach the camera to a tripod and poke it out of the top of the sunroof, as Tim Gartside did here (see image). Set up your composition before you set off, and make sure that the camera won’t move during the exposure. If your camera has live view this will make it easier to monitor what the camera is seeing, while you’re still safely strapped into your seat. If shooting through the sunroof a vari-angle LCD screen would be a bonus too.
The next step is for your designated driver to drive steadily along your chosen route while you shoot using a remote release. Your resulting images will record any lights as streaks. Tunnels, areas with lit buildings or lots of moving traffic may provide the best shots.

Tim Gartside wedged a tripod between the driver’s and passenger’s seats
and raised it so his camera stuck out of the sunroof. As his wife drove
down a local main road, Tim took pictures. Nikon D2x, Sigma 10-20mm, 10
secs at f/16. ©Tim Gartside
Exposure settings will vary depending on the ambient light levels and the result required, but start from a 10-second exposure at around f/11 and work from there.