How to make Panospheres ? Post Production
Post Production
The wonders of software offer a wide range of ways to not only ‘fix’ issues with your images, but also work into them significantly too. The filters and effects offered by Photoshop provide the essential framework to get creative, and your panospheres would be nothing more than a series of single shots without this post-production prowess at your disposal. You’ll need a familiarity with the Clone and Healing brush in particular, while Photoshop’s automated align and blend options take the hassle out of much of the work…
Step One
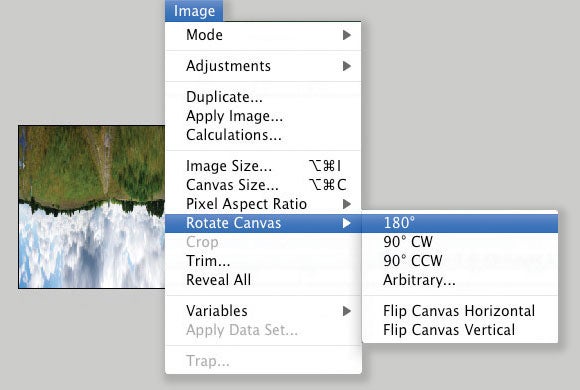
Ensure your panorama has a level horizon, otherwise you can’t form the perfect circle. A single arbitrary rotation [Image > Rotate Canvas > Arbitrary] can sort this. Arbitrary rotation repeated will diminish image quality, so you only want to do this once, if at all. If you get it wrong first time, undo the process and re-enter a more accurate value. Then re-crop so there’s no edge to your image. Then flip the whole canvas 180º – Image > Rotate Canvas 180º- so the sky is ‘on the floor’, as you want this to appear as the outside of your planet-like panosphere.

Step Two
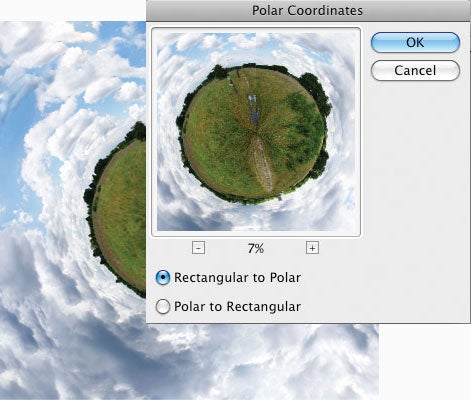
You’ll need to compress to a square format using Image > Resize in order for a circular shape to be possible. Next use PhotoShop’s Filter > Distort > Polar Co-ordinates filter, using the Rectangular to Polar option. Like magic, you have your basic panosphere!

Step Three
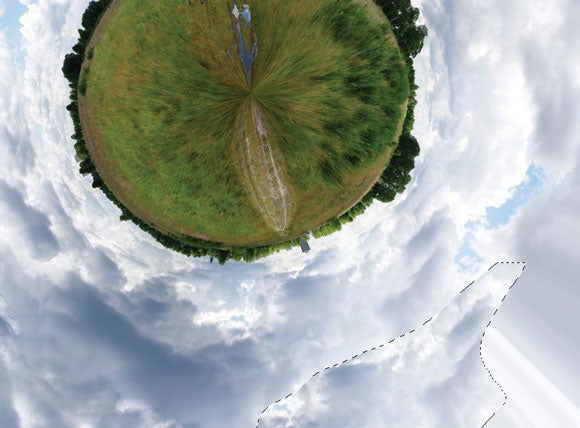
As we’ve not taken a more complex panorama you will have a ‘pinched’ quality to the centre and a vertical ‘joining’ line. Now it’s a case of Cloning and Healing the sky in, while removing any oddities for best effect. Some images will require a lot of work.


