
About HDR
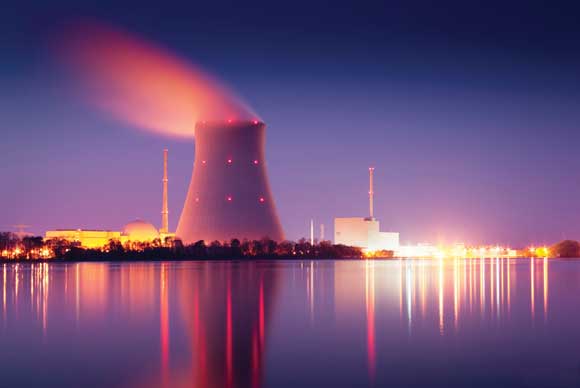
There are few photographic techniques that provoke so much discussion as that of HDR, or high dynamic range photography. The art of capturing several images of a scene, all with different exposures, and then combining them in post-processing, polarises opinion like no other. Some view it as a technical discipline that allows you to represent a scene in its true form, while others view it as photographic sacrilege which bears more resemblance to computer graphics than photography. While it’s safe to say that HDR photography can be grotesque when done badly, when HDR is done well, it produces results like nothing else.
High dynamic range photography and image processing allows the photographer to display light in the frame beyond that of a single exposure. It does so by facilitating several different images, all taken at different exposures, to be combined as one. For example, if you’re shooting a sunset directly and the exposure for the bright reds of the sky vary wildly from the dark tones of the foreground, it’s going to be impossible to capture an even exposure. However, with HDR photography, it’s simply a case of metering for the sky, and then the foreground, and capturing an exposure at each and anywhere from one to 10, or more, exposures in between.
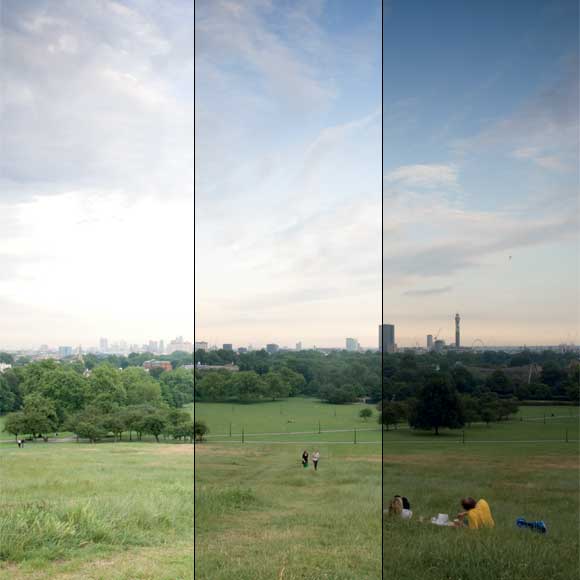
Shadows – Midtones – Hightones
These three images show the building blocks of the final HDR image on the page to the left. Firstly, an ‘overexposed’ image so the shadows are correctly lit, then an ‘underexposed’ image so the same is true for highlights, while covering the midtones with a correctly exposed shot
HDR Jargon
Brief guide to the terms used in processing HDR images
Strength
Essentially controls how vivid you want the HDR image by determining the strength of contrast enhancements.
Colour saturation
Saturation works much the same as in other imaging software, controlling intensity of colours within the frame.
Light smoothing
Controls the contrast variations and smoothness of graduation between them. If you’re wary of halos and other telltale signs of HDR processing, you’ll want this on its top setting.
Luminosity
In technical terms, this ‘controls the compression of the tonal range’ – in simple terms, if you move it to the right it’ll brighten the image by boosting shadow details, and moving to the left will give the image a more natural look.
Black / White point
These sliders control where the minimum and maximum values of the white and black in the frame, much the same as levels, and operate as another control over global contrast.
Gamma
This controls either the brightness or the darkness of the midtones of the image – another variable that, excessively used, can cause an artificial look to an image.
Temperature
Works much the same way as white balance, controlling the relative colour temperature throughout the frame.
Saturation highlights / shadows
A local adjustment for colour saturation in the shadows and the highlights of the image.
Microcontrast
Controls the level of contrast in local areas of the image.
Micro-smoothing
Will smooth out local detail enhancements, and as a result can give the image a cleaner, if slightly softer, look.
Highlight / shadow smoothing
Reduces contrast enhancements in the shadow and highlight in the image. Useful at reducing halos.
Shadows clipping
Useful to reduce clipping, and therefore noise, in the shadow areas of the image.
So, just skimming the surface of HDR photography clearly shows just how much there is to learn before you can truly master it. But don’t let that put you off – follow our handy guide and in no time you’ll be taking fantastic HDR images…
‘Cheating’
Now while a ‘true’ HDR image involves taking a whole range of different images, there is another way to create an HDR image that in some situations is preferable. The ‘cheat’ way to create an HDR image involves developing a Raw file in your chosen Raw software at different exposures, and then proceeding through the HDR generation process as before. The benefit of creating an ‘HDR’ file this way is that you don’t have to worry about keeping the camera still the whole time, and it allows you to consider images for HDR that you may not have before, such as shots with moving subjects. However, the finished product isn’t going to contain the same amount of dynamic range as a true HDR file, and any type of noise in the image originally is going to be amplified by the process. So, while it’s possible, it’s definitely not the best option.