Indoor Home Studio – Using a Lightbox

© Rachael Talibart
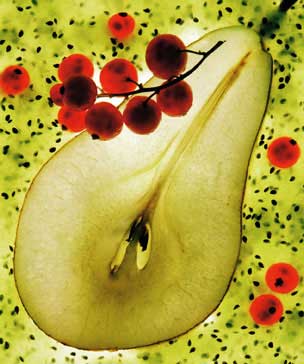
A good old-fashioned lightbox can be a great light source for the home studio photographer. If you’re an ex-slide film user you may already have one somewhere. If not, they’re cheap and easy to find secondhand. Lightboxes are ideal for backlighting translucent subjects, such as the slices of fruit shown here. Here’s how.
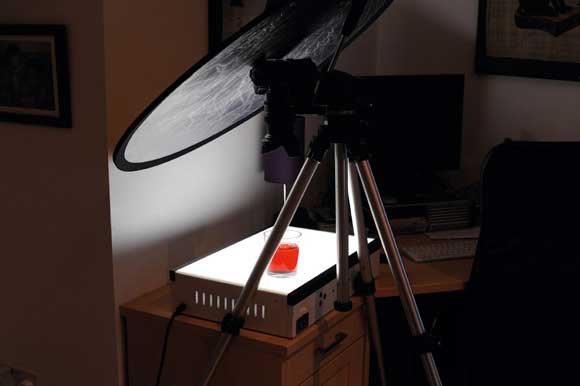
1. Set up your lightbox on a table or the floor, with the camera on a tripod pointing directly over it.

2. Set your white balance. If it’s a daylight balanced lightbox the Daylight WB setting should work best, but depending on the box you have the tungsten or fluorescent settings may be better.
3. Place your translucent subject on the lightbox. If your subject is perishable, such as fruit, you’ll have to work quickly before it spoils from the heat.

4. Fill the frame with your subject, excluding as much of the lightbox as possible. Placing black card around uncovered parts of the lightbox that aren’t in shot will reduce flare, increase contrast and cut the risk of incorrect exposure.
5. Stop down to a mid-range aperture such as f/8 or f/11. Shoot a test exposure, check your histogram and adjust accordingly before shooting. You’ll probably need to add plus one third to one whole stop of exposure compensation to avoid the lightbox recording a dirty grey. Use a remote release to reduce camera shake.
6. Some subjects may benefit from an additional reflector above the lightbox to bounce extra fill light back onto the front.

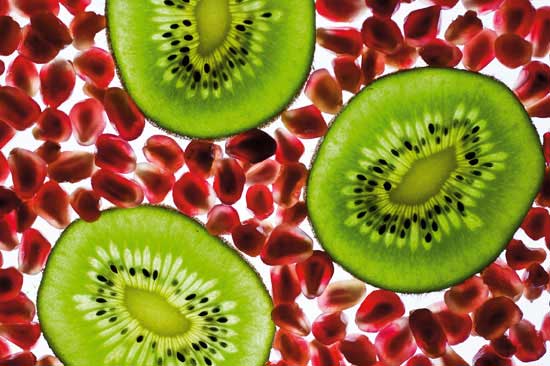
Rachael Talibart took this stunning shot of kiwis and pomegranates using a lightbox she bought to have some photographic fun during the winter months. ‘I arranged the fruit on a sheet of clear acetate,’ says Rachael, ‘which is crucial if you don’t want a sticky lightbox! Then I set exposure compensation at +1/3 to avoid underexposing the lightbox. Ideally I would have shot at ISO 100 and used a small aperture but the tripod I had at the time didn’t have the flexibility to stand centrally over the lightbox. So I compromised, using ISO 200 and f/5, being careful to make sure that I held the camera parallel to the lightbox. Handholding at 1/40sec with no image stabilisation was possible thanks to the lightness of the Canon 400D and Sigma 50mm DG Macro. I was pleased that at f/5, the image was still sharp from corner to corner. Although I shot in Raw, there was in the end little or no editing required.’ © Rachael Talibart – http://rtalibart.redbubble.com


