Bob Newman shows how you can achieve super-resolution if your camera doesn’t have such a feature

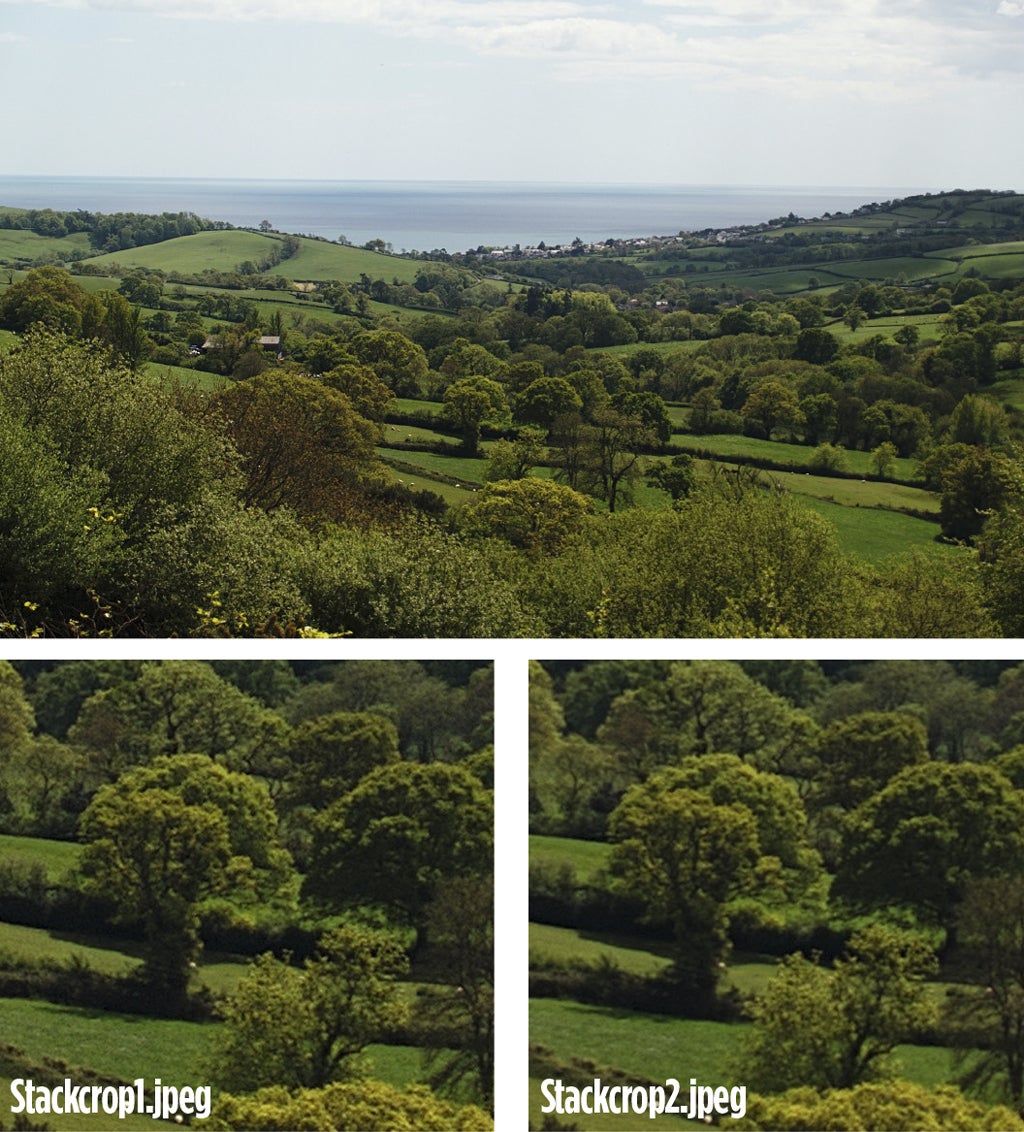
This stacked image (top) was constructed from six frames from an Olympus E-1, processed as below and reproduced 1.4x original size. The stacked crop (Stackcrop1.jpeg) shows a slight resolution increase over a single frame from the stack that’s been similarly enlarged (Stackcrop2.jpeg)
In my last article I discussed how three camera manufacturers have introduced super-resolution based on making multiple exposures, moving the position of the sensor between each. Here I’ll show how you might duplicate some of the effect if you don’t have a camera equipped with this feature.
The way this super-resolution works is essentially the same: multiple exposures are made, with the sensor shifted slightly between each. Instead of using precision piezoelectric actuators to achieve the effect, we’ll use camera shake. Obviously this is not as precise or predictable, so we’ll end up with multiple exposures with some randomised variation in position. While this can’t achieve the tidy, precise subsampling of the purpose-built mechanism, it will generally produce enough variation to give much the same effect.
The first step is to take your photographs. Six to eight seem to work well, and to avoid parts of the subject moving they need to be taken as quickly as possible – ideally putting the camera in high-speed drive mode and firing off a short burst. To get the required camera shake, the camera should be handheld (as steady as possible, trying to introduce shake will over-egg the pudding) and the shutter speed set high to avoid shake in any individual exposure.
Assuming that you have a set of processed photos (either camera JPEGs or processed yourself from raw) the next step is to align them with sub-pixel precision. To do this first up-sample the photos to double the linear resolution using your favoured image editor. The form of interpolation doesn’t matter too much, so long as it isn’t ‘nearest neighbour’, so I’d choose the quickest – probably linear.
The next step is to align the enlarged images. If you are using Photoshop you can load all the images as separate layers, and then use the ‘Auto Align Layers’ command. If you are using another tool, then there is a free, open-source programme you can use to do the job. It’s part of the ‘Hugin’ panorama tools (www.hugin.sourceforge.net) and the tool you need is called ‘align_image_stack’. It is a command-line tool, and needs to be given the filenames of all the images that you want aligned. It will work on them for a (long) while and then output a set of TIFF files containing the now aligned layers. You should load these into your preferred image editor as layers.
The next step is to merge the layers to one super-resolution image. To do this, set the transparency of each layer as follows. If we count the bottom layer as ‘1’, counting upwards, then the transparency of each layer needs to be set to 1/layer number x 100% – so layer 1 (bottom) is set to 100%, layer 2 to 50%, layer 3 to 33% and so on. Then simply flatten the image, and you have your super resolution image. It’s possibly more realistic to downsize it to about double the original pixel count (as produced it will have four times the count). This technique really can produce increased resolution and some freedom from aliasing effects.


