
How To Shoot Infrared – How to Shoot Infrared Photos
Preparing For Shooting
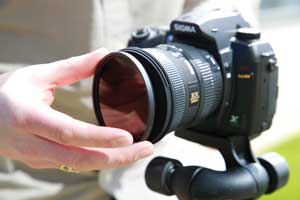 Even if you can see infrared light with your camera, without some additional preparation the chances are you won’t get very spectacular results. The common solution is to use an infrared filter on the front of your lens. These are very dark red in colour and block out all but the infrared light to your sensor. This causes one main problem for photographers, in that with the filter on you can’t see anything through the viewfinder. One solution to this is to compose first and add the filter at the last minute. Some specialist companies offer a service to convert your camera for infrared use. The sensor can be filtered to allow just IR or IR and visible light, while leaving you with a regular view through your viewfinder. This is not easily reversible though, so it’s best not to use your brand new model.
Choosing your subject
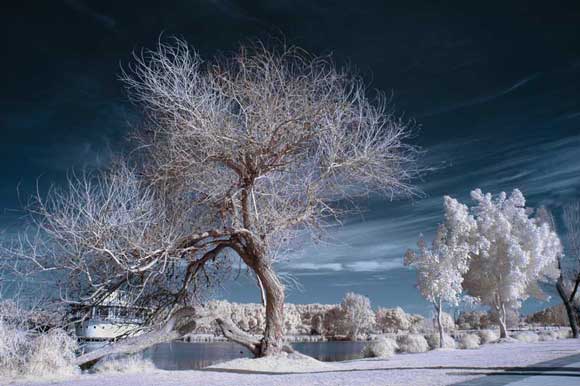
For the best results from infrared you should aim to include some foliage to give the trademark white glow. You don’t need bright sunlight – in fact a cloudy or overcast day can achieve the best results – but shooting in the summer provides more greenery and ensures there’s plenty of chlorophyll in the leaves. Try to contrast your greenery with something man-made: stonework looks good for mono images; or try some water and sky for darker colours.
Setting the white balance
Infrared light, by definition, has low colour temperature, so gives a very warm image. To counter this you need to make the necessary adjustments to the white balance. For natural results hold up a sheet of white paper (once the filter is on) and take a manual white balance reading. For more extreme results, however, try taking a reading from some green grass or from a blue sky.
Set to Raw with mono preview
Shooting in Raw format will not only allow you the best possible quality, but it will also give you the option to change the white balance during processing to fine-tune or accentuate the effect. If you are looking to achieve a mono infrared effect, select Raw+JPEG shooting and use your camera’s black & white or monochrome function (if it has one). This will allow you to get a better idea of the result on the back of your camera but still allow you to make the conversion during post-processing.
Use LiveView/LCD
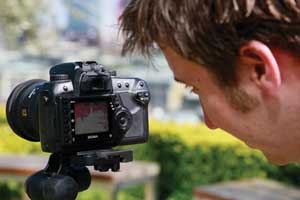
One of the main problems with using infrared filters on the front of your lens is that it renders the viewfinder virtually useless. If your camera has live view, however, this may still allow you to see your composition (though depending on how much light is coming through this may still be very dark) and allow you to fine-tune your shot before pressing the shutter. Alternatively you can just use your monitor to review the shots after you’ve taken them – and if your camera is mounted on a tripod you can then adjust as needed for the next shot.
Focusing
Due to the longer wavelength of infrared light, focusing may need to be adjusted in order to achieve sharp results. Cameras that are professionally converted for infrared will also have their focusing adjusted so you can still use the autofocus as normal. Alternatively, choose a wider aperture for increased depth of field and manually decrease your focus distance slightly.
Shoot in Manual
Depending on the light conditions you may need to adjust your exposure a lot from the camera’s metering, so switch to manual mode.