Photoshop's patch tool offers a one-stop solution for repairing large areas of an image. Here is a tip that will help you to get the best results from using it.
The patch tool was introduced into Photoshop at the same time as the healing brush and is one of those tools that tends to get overlooked sometimes. It offers a quick one-stop solution for repairing large areas of an image. However, patch tool work doesn’t always produce the results that most users expect. So, here is a little tip that you may find useful for getting the best results. But first, let me provide a little background info on the patch tool.
The patch tool uses the same complex algorithm as the healing brush to carry out its blend calculations, except that it uses selection-defined areas instead of a brush. When the patch tool is selected, it initially operates in a lasso selection mode that can be used to define the area to ‘patch from’ or ‘patch to’. For example, you can hold down the Option key (Mac), Alt key (PC) to temporarily convert the tool to become a polygonal lasso tool with which to draw straight line selection edges.
You don’t actually need the patch tool to define the selection; any selection tool or selection method can be used when preparing a patch selection. Then, once you have made the selection, select the patch tool to proceed to the next stage. Unlike the healing brushes, the patch tool has to work with either the Background layer or a copied pixel layer, but the selection area will preview the image as you drag to define the patch selection.
Source and Destination modes
In Source mode you can drag the patch tool selection area to a new destination point and preview the pixels that will replace those in the original source selection area. In Destination mode you can drag the patch tool selection area to a new destination point and Photoshop will perform a healing blend calculation, copying and blending the sampled patch area with a new area in the image. The Use Pattern button in the Options bar will let you fill a selected area with a preset pattern using a healing type blend.


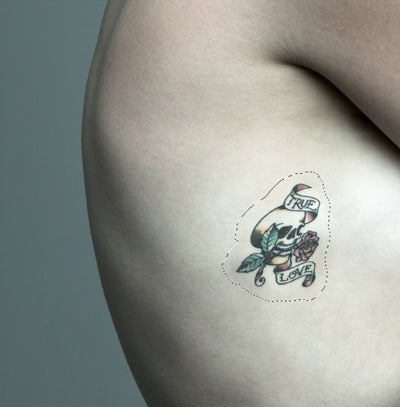
Step 1. The patch tool works in a way that is similar to the healing brush. Using the picture shown here, I can show you how the patch tool can be used in Source mode (see the Options bar) to cover up the tattoo on this model’s body. When you select the patch tool you can use it just like the lasso tool to draw around the outline of the area you wish to ‘patch’, and loosely define a selection area. Plus you can use any selection tool method you like to define the selection as you prepare an image for patching.


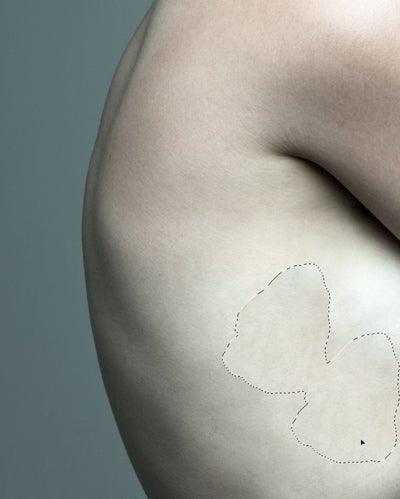
Step 2. Having defined the area I wanted to patch, I made sure that the patch tool was now selected in the Tools panel and dragged inside the selection to locate an area of the image that could be used to ‘patch over’ the original area (i.e. remove the tattoo). As I dragged the patch selection this created a second selection area and I could see a live preview in the original patch selection, indicating which pixels would be cloned here.

Step 3. As I released the mouse, Photoshop began to calculate a healing blend, analysing the pixels from the source area (that I had just defined) and used these to merge seamlessly with the pixels in the original selection area. The result of this patch transformation was pretty impressive, as it managed to remove the tattoo, but you’ll notice that a dark shadow remained in the middle of the patch area.

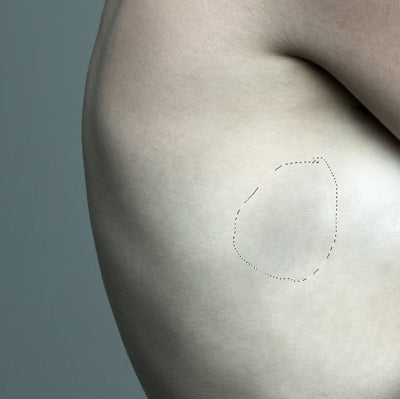
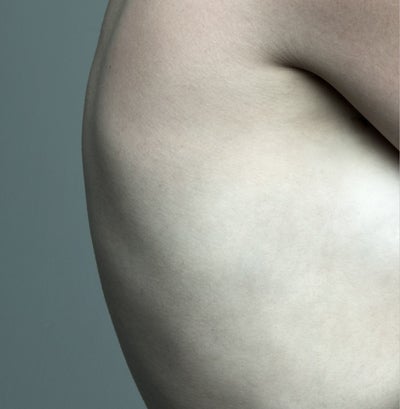
Step 4. This is something to be expected and simply means that the patch tool action wasn’t completely successful at removing the tattoo in one single step. Remember, the original patch tool selection was still active and all I had to do was carry out a further patch tool action by repeating step 2. This screen shot shows what the model’s body looked like after applying the patch tool twice. As you can see, all traces of the tattoo are now gone.
For other editing software to use instead of Photoshop visit our buying advise page.


