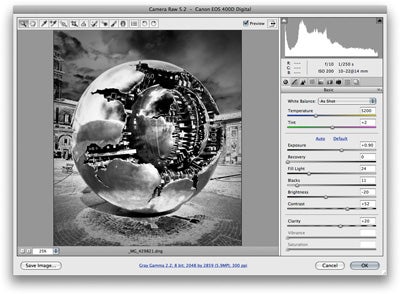
Black and white solarisation using Camera Raw
The solarisation or Sabatier effect originates from a darkroom technique commonly associated with the photographer/artist Man Ray, who perfected the technique and made it popular among photographers. By fogging a black and white print during mid development, one could achieve a partial reversal of some of the tones and end up with a mixture of positive and negative tones in the final print. Here is a Photoshop technique that has evolved into one that can now be done using Camera Raw with Photoshop CS3 or CS4. Ideally, you should use this method to edit raw originals, but it can also be made to work with JPEGs or flattened TIFFs.
There is also a Photoshop method you can use that is quite simple: you can apply a Curves adjustment, click on the pencil button to switch to draw mode and created an inverted V-shaped curve. The Camera Raw method is similar. In the example shown here, I went to the Point curve editor in the Tone Curve panel, added three points to the curve and dragged the top right point down to the bottom right corner. This allowed me to create the inverted V-shape shown in Step 4. The best thing about using Camera Raw to solarise an image is that when you revisit the Basic panel you can readjust the main sliders there and this allows you to further modify the solarisation effect. You will notice here that I opened the Camera Raw processed image as a Smart Object, which allowed me to create two versions of the original master and then blend the two together using a pixel layer mask.
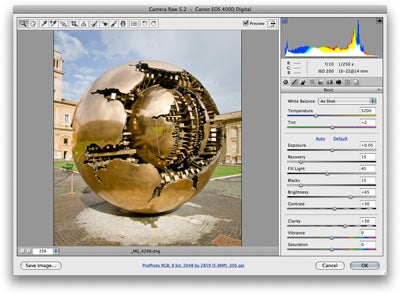 1 This technique was carried out on a raw original photograph, although you could get this to work equally well using a JPEG or flattened TIFF image.
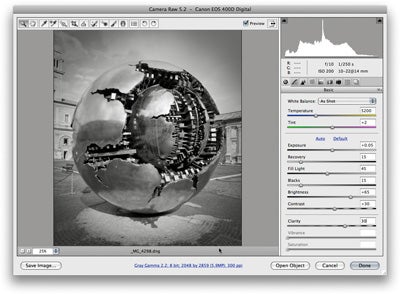 2 I began by converting the photograph to black and white and adjusted the HSL/Grayscale and Basic panel settings to achieve an optimum grayscale image from the color original. When I was happy with these settings I held down the Shift key to change the ‘Open Image’ button to ‘Open Object’ and clicked to open the photo as a Smart Object in Photoshop.
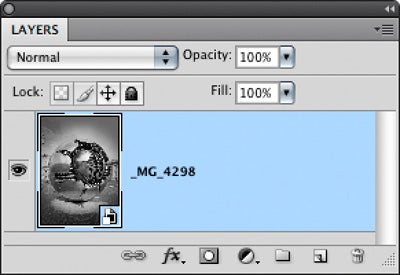
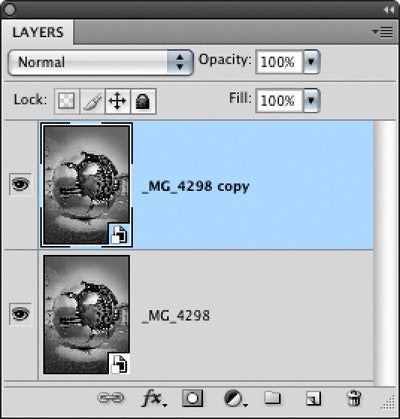 3 On the left is a Layers panel view of the Camera Raw Smart Object layer. I made a copy of this layer by going to the Layer menu and choosing Smart Objects > New Smart Object via Copy. Note that you can also access this menu item by right-mouse clicking on the Smart Object layer and selecting New Smart Object via Copy from the contextual menu (Mac users who don’t have a two button mouse will have to hold down the Control key to access this menu). I made sure that the copy Smart Object layer was now selected so that the following steps were applied to this layer only.
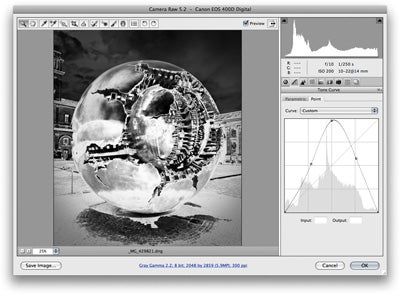 4 I went to the Tone Curve panel, selected the Point curve editor option and made the inverted ‘V’ curve shape you see here to create the solarised look.
 5 I then switched to the Basic panel and adjusted the tone controls to further modify the effect. This is where using the Camera Raw controls really give you the edge, as adjusting the Exposure, Recovery and Fill Light sliders can make an enormous difference to the solarised effect.
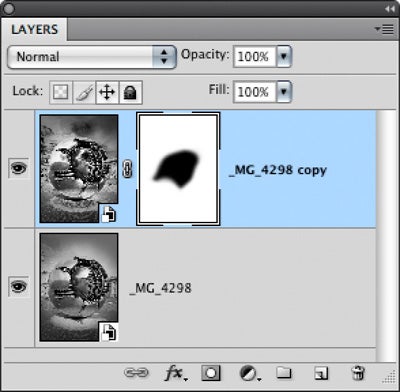
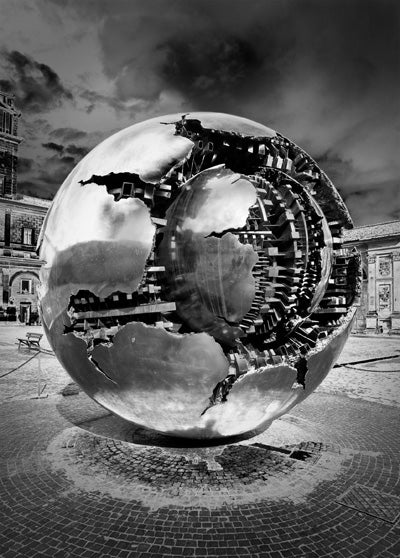 6 At this stage I now had two Smart Object layers of the same source image in the Layers stack. I had processed the lower Smart Object layer as a normal black and white conversion and had processed the upper layer using the Solarised settings shown in Steps 4 & 5. I added an empty pixel layer mask to the upper layer, and painted on the mask with black as the foreground color to hide portions of the solarised version and reveal the non-solarised version on the layer below. A further benefit of the Camera Raw Smart Object approach was that I could continue to edit the individual Camera Raw settings on each of the Smart Object layers.
For other editing software to use instead of Photoshop visit our buying advise page.


