
Sharpening your photos in Adobe Camera Raw and Lightroom. What Digital Camera shows you how sharp images can be acheived to maximum effect...

Sharpening, as most of you may already understand the importance of, is a post-capture means of improving the overall clarity of photos.
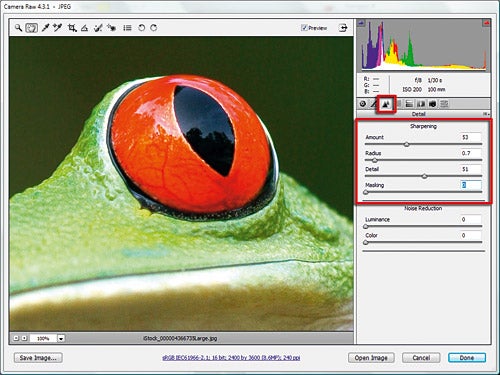
Many photographers purposely turn off in-camera sharpening options, preferring to take their time and use the tools in their favourite editing software for the task, resulting in crisper, more accurate sharpening. For Raw users this used to mean employing the simple two-slider setup located in the Detail section of either Lightroom or Adobe Camera Raw (ACR). It used to, because in the latest updates for the programs, the number of Sharpening controls has grown to four – Amount, Radius, Detail and Masking.
The inclusion of two new controls (Detail and Masking) contributes substantially to the user’s ability to fine tune the sharpening in their images and reduces the need for images to be transferred to Photoshop for customised sharpening after conversion. But the good news doesn’t stop there! In Adobe Camera Raw (from v4 onward), and Lightroom, it has also been made possible to enhance TIFF and JPEG files in the program. So what is good news for Raw shooters is equally good if you capture in TIFF or JPEG. So with this in mind, let’s look at each control in turn and how to put these new sharpening options to work for optimum sharpening:
1: 
Ensure the preview is set to 100%. Lightroom users just need to click onto the warning triangle in the top left of the Detail pane to zoom to 100%. ACR users will have to use the Zoom tool. The Amount slider controls the strength of the sharpening effect. High values create more pronounced results; smaller numbers produce subtle changes.
2: 
The Radius value determines the number of pixels around the edge that are affected by the sharpening. A low value only sharpens edge pixels whereas high values produce more pronounced effects. As high values can also create contrast halos effects around your picture, start with a low value first.
3: 
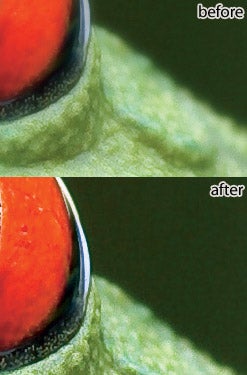
The Detail slider increases the appearance of sharpness by increasing the local contrast surrounding edge areas, so enhancing details. It works well on textured subjects but use it carefully on smooth areas. Moving the slider to the right increases the clarity; dragging it left decreases the effect and reduces the appearance of halos.
4: 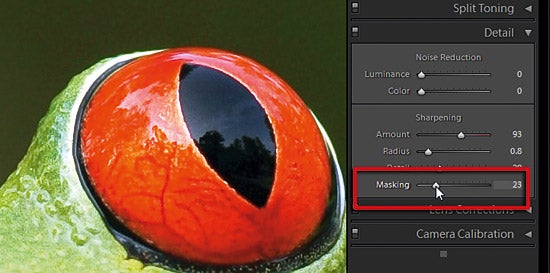
The Masking control interactively applies an edge locating mask. Sharpening via an edge mask isn’t new; encapsulating the process in a single slider control is. A setting of 0 applies no mask – all detail is sharpened. Moving the slider right gradually isolates edges until, at 100, sharpening is only being applied to the most contrasty edges.
5: 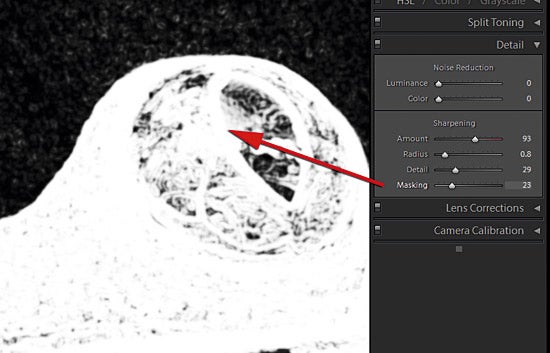
Holding down Alt/Opt as you move the slider previews the masked areas so you can fine-tune where sharpening is applied. None is occurring in black parts of the mask; in areas masked by grey partial sharpening is applied; and white mask sections the full effect is revealed. As the slider goes further right, only the photo edges are sharpened.
6: 
ACR can also preview settings for the other sharpening sliders. Holding down Alt/Opt and moving the Amount slider displays a ’luminosity only’ version of the image. Alt/Opt with the Radius slider highlights the ‘edges’ to be sharpened and the width of the sharpening. The Detail with Alt/Opt previews the details that will be targeted.