How To Shoot Infrared – Adjusting and Creating Infrared Images in Image Editing Software
Adjust in software
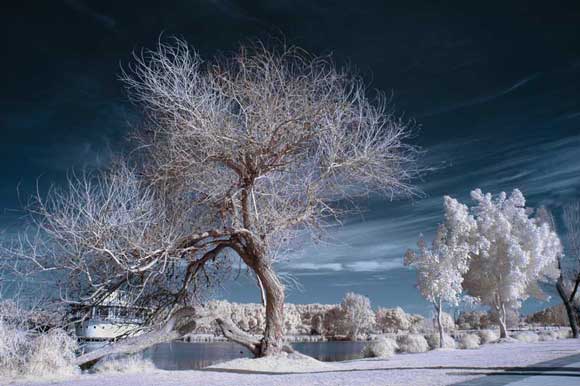
All digital infrared images will need a little bit of a tweak in editing software to give an effective result. Apart from adjustments to the white balance, images will normally need a boost in contrast which is best done using the Levels palette. To achieve a mono infrared, convert to black & white by desaturating the image and then adding contrast (see steps below), or a dedicated black & white conversion mode, as features in recent versions of Photoshop CS and Elements. If you want to keep your image in colour it can help to add some extra saturation to your colours, and some more contrast for an extra punch. For more surreal colours you can use the Channel Mixer in Photoshop and swap the Red and Blue channels by setting the Blue channel to 100% Red, and the Red channel to 100% Blue. Achieving colour results that you’re happy with can take time, and lots of experimentation with settings. There’s no right answer, and don’t be afraid to make mistakes – make notes though, as you may stumble on success.
Step One
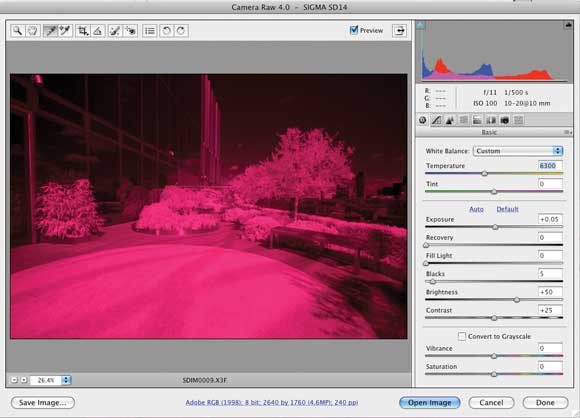
Your infrared image will look very red or pink to start with. First, open the image into your Raw converter and adjust the white balance to give you the most detail in the image. Here, 6300K was about right.
Step Two
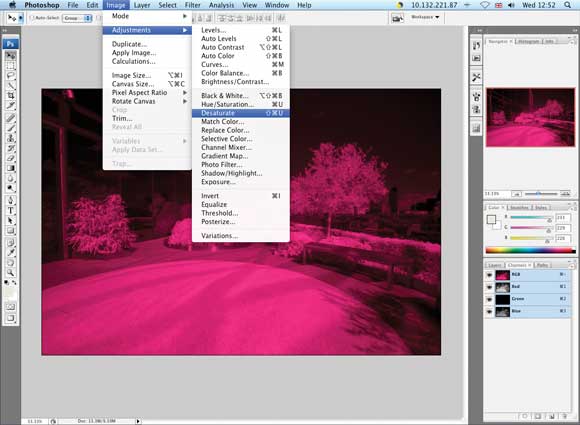
To remove the colour from your image do Image>Adjustments>Desaturate (or Ctrl+Shift+U on the keyboard). You will now have a rather lacklustre grey image but this can be easily addressed.
Step Three
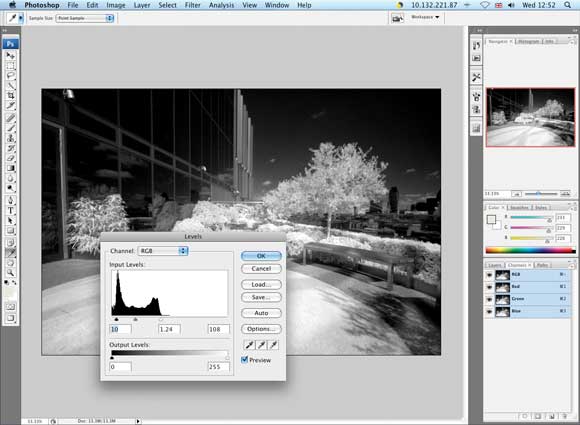
To boost the contrast, go to Image>Adjustments>Levels (or Ctrl+L). Now drag the left and right sliders in to meet where the histogram starts to rise. Also move the centre slider slightly to your liking.
Faking Infrared with Software
Where there’s a technique, there’s a trick, and most editing software provides a method of simulating an infrared effect by boosting the greens and yellows with a mono conversion to make any plant life appear to glow. Photoshop does this from its dropdown menu of presets in the Channel Mixer, while others, such as Corel Paint Shop Pro X2, feature it as a filter.
Step One
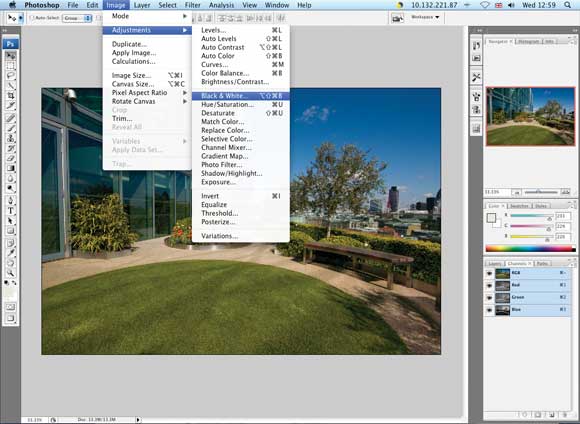
To make the conversion, first go to Image>Adjustments>Black & White. If you have an older version of Photoshop, or alternate software, you can use your Channel Mixer for similar results.
Step Two
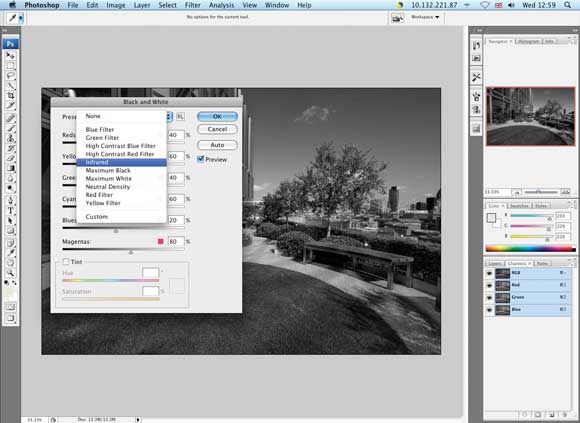
Select Infrared from the dropdown menu. This will give you a black & white conversion with boosted levels in the yellows and greens to give extra brightness and an apparent glow from any plant life.
Step Three
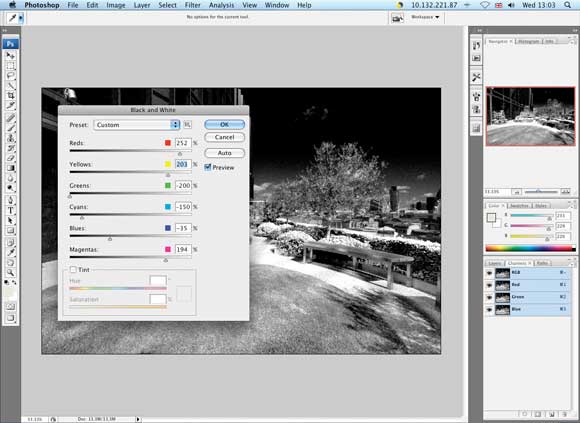
Now you can manually adjust the levels as done here to fine-tune your infrared effect. Boosting the Reds and lowering the Blues helps to darken the sky and whiten up the greens.


