
Your Complete Guide to Flash Technology:
Flash Gun Anatomy
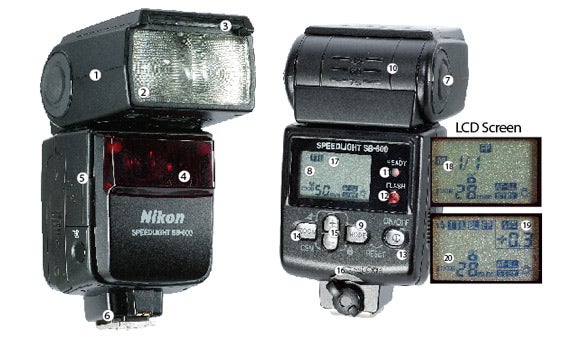
Anatomy of a Flash Gun
A run-down of the features of the most common type of flashgun, the hotshoe mounted flash
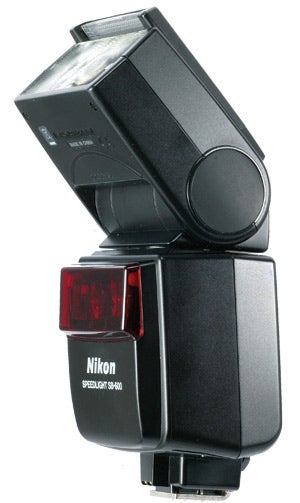
1 Flash head
This is where the light source, in the form of a flash tube and silver reflector panel behind it, are housed. On mid to high level units, the flash head tilts and swivels to provide directional lighting by bouncing the light off ceilings, walls or other surfaces.
 2 Diffuser panel
The flash tube, that provides the flash burst, is protected by a diffuser panel that softens and spreads the light.
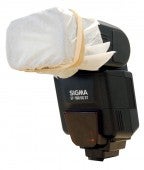
3 Wideangle diffuser
Often housed in the roof of the flash head, or available as a clip-on accessory, the wide-angle diffuser spreads the coverage of the flash to allow the use of wideangle lenses and reducing flash fall-off in the corners and edges of the image.
4 AF illuminator
In extremely dark conditions, a red patterned burst of light enables the camera’s autofocus sensors to ‘see’ the subject and focus the lens.
5 Battery compartment
Most flash units accept AA batteries, though some use higher-capacity Lithium batteries. Small flash units may accept AAAs. It’s worth investing in powerful rechargeable batteries as flash requires a lot of power. And always have spares!
6 Foot
This attaches the unit to the camera’s hotshoe plate. Different manufacturers use different contacts, enabling the flash and camera to communicate, so make sure your camera and flash are compatible.
7 Tilt and swivel lock release
This button releases the lock to allow tilt and swivel movement of the flash head. Older models or some hammerhead units don’t have this, making it easy to knock the flash from the required position – so be careful!
8 LCD
The various flash settings are illustrated in this panel, which is backlit, to enable easy reading in the dark.
9 Mode/function button
Allows the user to choose between TTL operation and manual operation.
10 Tilt position guides
The angle of the tilt is measured with these engravings. Each angle has a notched position from 45 to 90 degrees. Similar engravings can often be found beneath the flash head when using the swivel motion.
11 Ready light
Indicates when the flash is charged and ready to fire.
12 Flash discharge
Tests, or discharges the flash.
13 Power button
Switches the unit on and off.
14 Zoom button
Allows the user to manually change the zoom flash position to match that of the lens focal length. This is generally used with older lenses that may not be recognised by the camera body. This will be set automatically if you’re using more recent lenses.
15 +/- buttons
These are used to change the power output, either in manual mode or in flash exposure compensation mode.
16 Foot mounting lock
Locks the flash to the hotshoe.
17 TTL mode
The TTL mode is the automatic function, whereby the choices you make on the camera are automatically matched by the flash. This mode works well in Aperture Priorty AE, Shutter Priority AE and Program, as well as full auto and scene modes. TTL is really a film-based mode, but digital versions include Nikon’s i-TTL and Canon’s E-TTL
18 Manual mode
In manual mode, the user selects the power output of the flash, from full power (1/1) to 1/64 power, dependent on model. Each step is the equivalent of
one stop of exposure (1EV).
19 Exposure Compensation
Mid to high-end flashguns may offer flash compensation, with similar functions to camera exposure compensation. Because automatic flash are closely linked to the camera’s metering system, occasionally the camera can be fooled by such things as excessive whites or blacks in a scene, and you may need to adjust the flash to allow for this. Depending on your make and model, each increment is in ½ or 1/3 stops.
20 Zoom
The focal length of the lens is important in the output of the flash, in order for the flash to provide full corner-to-corner coverage of the image frame, and to provide the correct exposure in terms of output and camera-to-subject distance. The flash may provide automatic internal motorised adjustment of the flash tube and reflector, or on cheaper or older models the user would manually set the zoom head according to a set of ‘clicked’ adjustments. It should be noted that the zoom should be set to true focal length, not digital equivalents.