We tested the Sigma 50mm f/1.4 DG HSM Art lens and found it to be one of the best 50mm optics, if not the best, that we have ever tested. Yes, at around £850, the Sigma 50mm f/1.4 lens is expensive, especially when you compare it to the Nikon equivalent, the AF-S 50mm f/1.4 G, which costs just £280 – almost £570 less.
However, if you thought the Sigma lens was expensive, make sure you are sitting down when
you hear the price of the Zeiss Otus 55mm f/1.4. It costs around £3,170 and it doesn’t even
feature autofocus.
Features
The first thing to mention about each of these lenses is that the optical design is very different
from the more typical design for a 50mm f/1.4 lens. We would expect this type of lens to have between six and eight elements in five or six groups, yet the Sigma design features 13 elements in eight groups, and the Zeiss lens 12 elements in 10 groups. Obviously, this significantly adds to the size and weight of these lenses, which we will come to later.
Build and handling
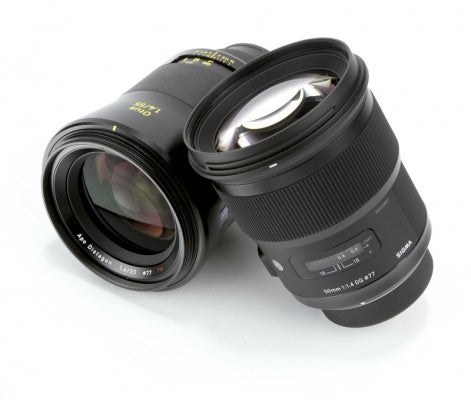
Neither of the standard lenses on test here is particularly small in comparison to the respective optics from Canon and Nikon. In fact, the lenses are both very substantial. The Sigma 50mm f/1.4 weighs 815g, but the Zeiss Otus tops this with a weight of 970g. It is the no-compromise optical design of the lenses that is the reason for their size and weight.
In both cases it is more like carrying a 24-70mm f/2.8 zoom. If you are more used to shooting portraits with a 50mm f/1.8, the weight will make itself known on your forearms before too long.
With the Zeiss Otus being a manual-focus lens, this mechanism has to be of the very highest quality, and indeed it is. It is the smoothest focusing ring that I have ever used on any lens. It feels like it is gliding as you turn it.
While the focus ring of the Sigma lens isn’t as wide as the Zeiss, it does have a ridged grip to prevent slipping. The focusing mechanism itself feels a little more rigid and less fluid compared to the Zeiss. However, the Sigma 50mm f/1.4 manually focuses just as easily as the vast majority of premium lenses on the market. It has nice torque, it doesn’t slip or feel loose, and there are no clicks or whirrs from the cogs that engage with the AF motors.
Image quality

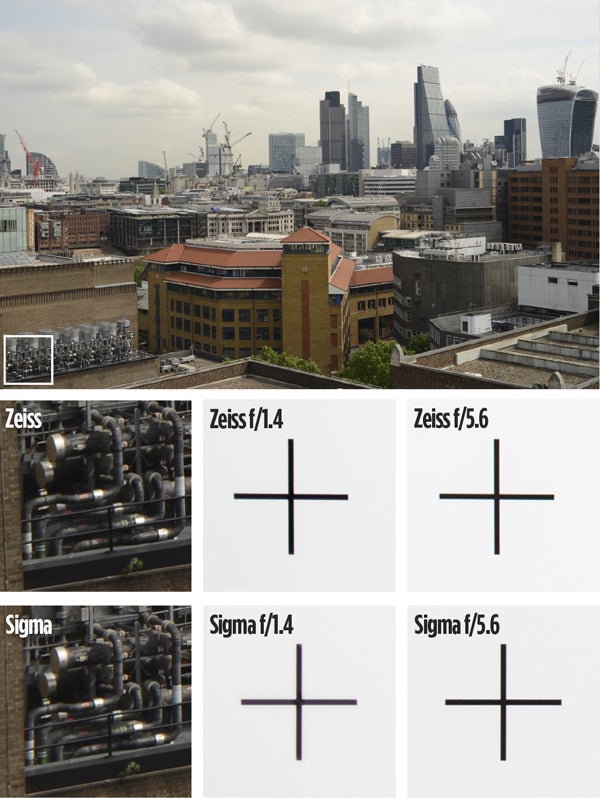
Image: Images taken from a real scene, and of our test chart, reveal that the Zeiss is slightly better in the corners when shooting at f/1.4. Pull-ups shown at 100% at 300dpi
To test the lenses and really see the differences between them, we used each of them with a Nikon D800E in a Nikon fit. Looking at the comparison images, you would be hard pushed to see the difference between the two lenses. With very careful focusing, and keeping the camera as steady as possible, you can see that in terms of centre resolution the Zeiss is better – just.
Both lenses provide lovely smooth out-of-focus areas that look fantastic, and the rounded aperture blades keep them looking that way, even when stopped down.
Regarding the edges of the image, again the Zeiss is the better of the two lenses, and is amazingly sharp in the very corners, even when wide open. However, at f/5.6, both lenses are as close to providing edge-to-edge sharpness as any lens we have seen.
When wide open, there is the merest hint of chromatic aberration visible when high-contrast edges are in the corner of the frame. Red and cyan can be seen in the Zeiss, and green and magenta in the Sigma, but to reiterate, it is only really noticeable if viewing at about 200% and if you are looking for it. In both cases it is simple to remove in software.
There is some vignetting from both lenses, although for many subjects it wasn’t an issue and actually helped to draw the eye to the centre of the frame, particularly when shooting portraits.
Putting real-life images to one side for a moment and looking at the resolution graphs, the shape
of the graphs produced by each camera is strikingly similar. However, the Zeiss lens is fractionally better at each aperture, but again, only just.
Manual Focusing
One thing that is important when considering a lens that is manual focus only is just how well you can manually focus. This isn’t just down to your eyesight, but also the camera that you are using, and the subject matter of your images.
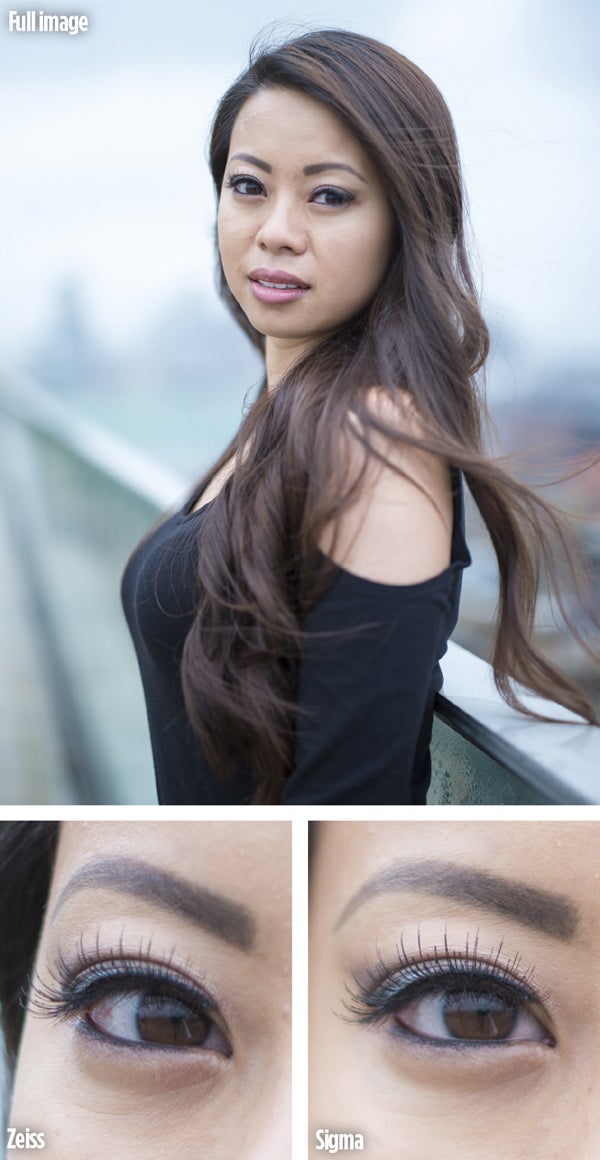
When shooting at an aperture of f/1.4, with the very shallow depth of field that comes with this, it only takes the focusing to be fractionally off for the subject to be slightly out of focus.
Another consideration is how the camera aids you to manually focus. Some cameras with live view will allow you to use a 100% pull-up, which is very precise, and you may also be able to use focus peaking to get an indication of the sharpest points of focus. AF indicators are also found in the viewfinders of most DSLRs.
It is vital to understand how these manual-focus aids work in your particular camera. Focus peaking and the AF indicator systems often work over a small range of focus, rather than a particular point, so it is important to know where the precise point of focus is in that range. Check by taking a series of images at the largest lens aperture between where the focus peaking or indicators come on and go off. This should help you discover how to best use them to help manually focus your camera.

Image: This portrait image shows just how difficult it can be to precisely manually focus a lens with the aperture set to f/1.4. Here the Zeiss is just a fraction off compared to the Sigma lens, which was autofocused


