
Masks are great for hiding and revealing parts of layers without actually removing the actual pixels to be hidden. Layer clipping paths are one way of creating a mask and you would be forgiven for thinking you had to know how to create paths to use them. Not so... Try this technique where we use an outline on one layer to clip the other layer in the composition.


Using a clipping path is a non-destructive way of incorporating shapes into a design.
Pro’s Tip: Here we clip just one layer but you can add as many layers as you like to make a clipping group. You just need to make sure the mask layer is at the bottom of the stack, not necessarily at the bottom of the Layers palette, and that all of the layers to be clipped sit directly above it.

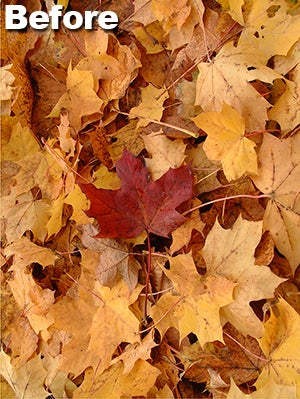
01 Collect everything you need. That should include a background or file on which you’re currently working, a subject with a suitable shape to clip to and at least one image to fill the clipped shaped when it’s ready.
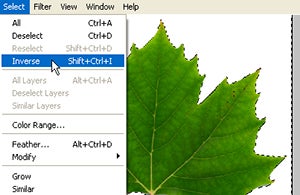
02 To produce the shape for the mask you need to select it. Our subject is on a plain background so we’ve used the magic wand to select the background first because it was easiest. Now we need to go to the Select menu and choose Inverse so the leaf is selected instead.
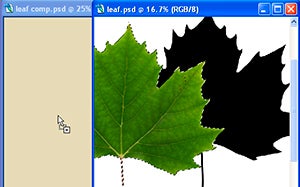
03 Then it’s simply a matter of using the move tool to drag the leaf into the waiting window with the new background. As you begin to drag it will look like the leaf is being cut out but it’s actually being copied from one window to the next.

04 The leaf appears on a layer of its own with a checker board pattern to indicate the transparent area surrounding it. Continue building the image by dragging on the layers that will provide the fill for the masked shape. In this case we’ve added a photo of autumn leaves.
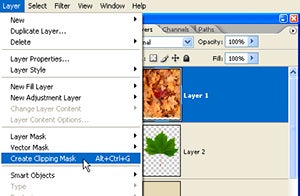
05 As you work make sure the layer providing the shape is on the bottom but it can’t be the background layer. First of all click on the fill layer to make sure it’s the active layer in the Layers palette. Then go to the Layers menu and choose Create Clipping Mask. The command is also available from the palette menu.

06 Immediately the fill layer is clipped to the shape of the leaf below. On the Layers palette the thumbnail of the clipped layer is indented and an arrow shows the relationship. Use the move tool to reposition the fill layer in the image and you’ll appreciate that it remains intact and hasn’t been altered at all.
In Photoshop:
Layer > Create Clipping Mask
Win: Alt Ctrl G Mac: Cmd Option G
In Photoshop Elements:
Although Photoshop Elements doesn’t contain the clipping masks option you can use the Layer > Group with Previous command to give you similar results.