
1 Protection
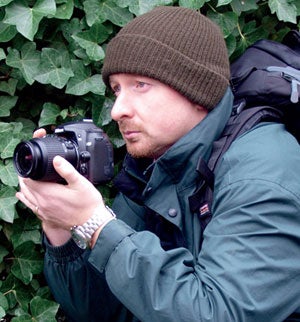 It may sound obvious, but wandering off across the dales in jeans and t-shirt is asking for trouble. Even if it isn’t cold or raining when you set out, the weather can change and you should be ready for it. Wrap up warm, wear waterproof outer wear and a hat for insulation. A good pair of walking shoes is a must too.
We should also take steps to safeguard our photo kit. Choose a tough camera bag that offers water and wind resistance. Some brands come with a built-in rain cover. Next, consider lens protection. All lenses will benefit from an inexpensive UV filter, which will help shield the precious front element from windborne particles and the type of salty spray found at the coast.
Rain or drizzle? Take an All-weather Protector (about £30 from Kata). This clear plastic sleeve will envelop your DSLR (apart from the lens front). Controls are accessed through side sleeves.
When you get home, leave your camera in its bag for five to 10 minutes to acclimatise. This avoids warm air condensing into mist as it meets the cold surface of the lens. And always keep silica gel sachets in your kit bag, as they help absorb excess moisture.
 2 Make the Most of Raindrops
One thing that you can be pretty much assured of in Britain, come summer or winter, is rain. But has it anything to offer us photographically? Capturing the motion of the speeding droplets represents just one interesting avenue of exploration, but another, more considered though equally satisfying, approach is to concentrate on their still form i.e. raindrops.
Of the man-made surfaces that might serve as a host, glass, metal and polished stone hold the water’s intricate form well, while waxed paintwork seems to offer the very best resolving power for individual droplets. However, raindrops form almost anywhere: they hang gregariously beneath twigs; enthusiastically colonise the webs of spiders; will happily speckle the planks of a park bench and frequently adorn fluffy seed heads and all kinds of leaf.
Nevertheless, having a few pointers to help tackle this subject is no bad thing, and so, compiled here is a ready-made series of steps that will assist you in making the most of this often overlooked marvel of nature.
STEP BY STEP
 One: Get close
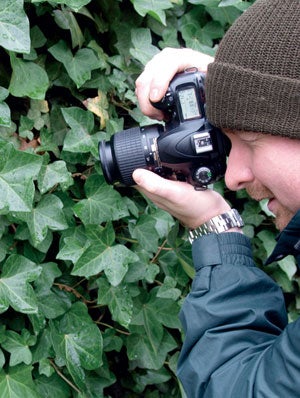
Because of their small size you’ll need a macro lens or the close-up facility of a compact camera to make a real statement out of raindrops. Use a tripod. Admittedly they can be a bind to carry and set up, but with close-up work you really do need one: to keep the camera rock steady, to free up your hands and to maintain a constant camera-to-subject distance. This is important as a reduced depth of field will allow for no focusing inaccuracies.
Two: Background & depth of field
When shooting raindrops (or any still-life) aim to delineate your main subject from surrounding distractions. There are at least two ways you can do this:
1) Adjust your shooting angle to select a simple background that contrasts in tone with the subject. A mid-tone or darker one will help the raindrops stand out.
2) Set a large aperture to completely blur the background, so the object will be in sharp focus. A polariser may also help clarify the scene by removing surface glare and deepening colour.
Three: Set exposure and white balance
Spend some time now getting your white balance right. However, if you shoot in the Raw file format you’ll be free to adjust it later. Think about using a grey card to help set exposure. Switch your camera to manual mode and place the card in view so that it is in the same light as your subject. Once the correct exposure is ascertained it’s handy to know that it will remain valid as long as the light levels remain constant. This saves a lot of potential work.
 Four: Focus & depth of field
Here’s the crucial bit: focus accurately on your subject and think about what exact plane needs to be sharp.
In other words – where do you want the viewer’s eye to settle? If autofocus proves ineffective during this process, switch to manual. Also remember to check depth of field. If your camera has it, depress the depth of field preview button to get an idea of what the zone of sharpness will cover in the final shot. To avoid camera shake, use your camera’s self-timer function to take the image, rather than pressing the button yourself.
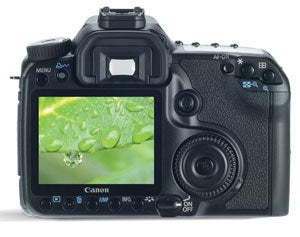
Five: Review your results
LCD screens can give a false impression of image sharpness so it’s vitally important that after taking a picture you use your camera’s zoom facility to review the shot in close scrutiny. If the results aren’t as they should be, then identify the problem and shoot again.