
Bad Weather Photograhy: How to paint with lightning
 5 Paint with Lightning
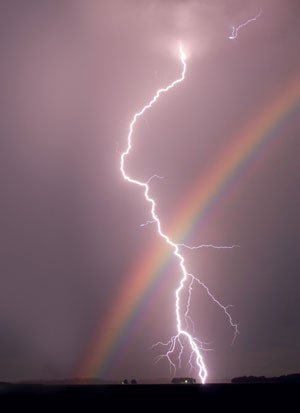
Lightning is likely to be the most dangerous subject that any photographer will tackle, so personal safety is of utmost importance. The only reasonably safe shelter during a thunderstorm is inside a substantial structure such as a house. If you do get caught outside then the fully enclosed body of a car will offer some protection. Exposed and elevated areas next to tall objects are the least safe places to be – so keep away from high places and trees! Proximity is the other critical element of safety. Only attempt to photograph lightning that is at least five miles away. As sound travels one mile in five seconds, a delay of 25 seconds would indicate a secure distance. Furthermore, give a good 30 minutes before venturing out after the storm. For more detailed safety info take a look at: www.bbc.co.uk/weather/features/understanding/lightning_safety.shtml
Keeping the above in mind, the occasion of lightning can make for very unique and powerful photos. Though possible during the day, it’s much simpler shooting at night. Staying within easy reach of your car or a house, find a low-lying vantage offering a clear vista. Set your camera on a sturdy tripod and attach a wideangle lens – f/8 teamed with ISO 100 is well matched to lightning at a distance of five miles, so set this on your camera. If the action is further away, open up to f/5.6 and zoom in. (If it’s nearer, take shelter!) Focus manually on infinity, set shutter speed to B and take a shot, holding the shutter open until you’ve captured one or two strikes. A remote release is ideal, but if you don’t have one then set an exposure time of about ten seconds and use the timer function to take the picture. Bracket your shots for variety.
If you’d like to add a creative twist, try combining a multiple exposure with coloured filters. This entails taking several shots all on one frame, changing the filter between each. The combined results will be vivid and highly original.
6 Fog and Mist
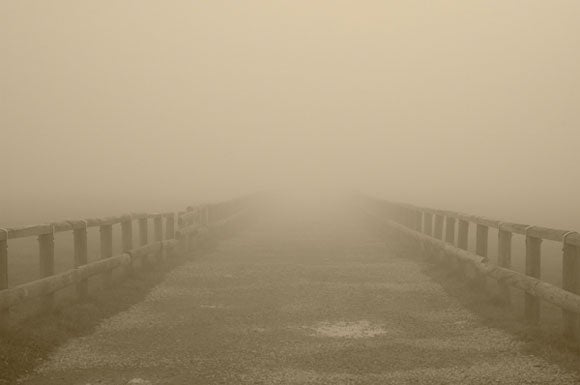
The air is loaded with invisible water vapour. Low temperatures can force these droplets to condense, forming mist and, if the mist becomes very dense, fog. Mist and fog are most likely to form when a reasonably mild day is followed by a long, cold night such as those in November to January; river valleys and other low-lying areas are the best locations. Get up early so you can take some shots of mist lying in the folds of the land. Find a high vantage and use a long telephoto lens to sandwich the ethereal bands together for maximum impact.
However, fog is more likely to endure during chilly evening hours, when you can craft truly theatrical views. Street lamps seem custom made for great foggy pictures so use them, either in or out of the shot, to add drama. Fog has the action of distinctly separating foreground tones from those more distant, so include something close by or your image may lack weight. Use a tripod, and consider adding grain through ISO choice.
Finally, a superb way of dealing with the garish cast given off by street lighting is to tone your image in Photoshop (Image > Adjustments > Hue/Saturation (tick colorize box).
7 Reflections
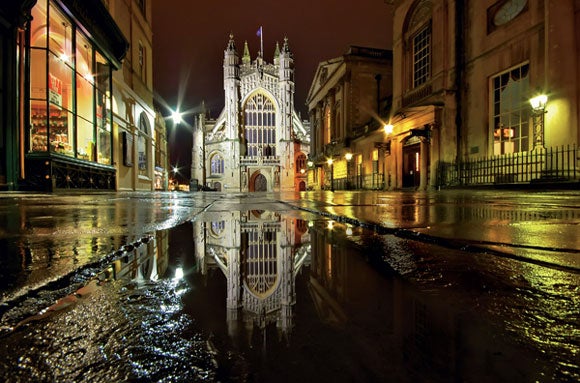
Sheets of water lying everywhere may not be everyone’s idea of a promising photo opportunity; however the natural consequence of rain ought not to be dismissed out of hand. Puddles and wet surfaces left over from a recent downpour act as mirrors, reflecting the light that is available. This often invigorates dull scenes, making them into something worth photographing. These kinds of reflections also provide an unusual view of the world and can form the basis for intriguing abstract compositions.
Put to the purposes of an artful eye, a puddle can provide a good vehicle for a fascinating exploration into framing. Framing is the action of positioning your subject within the picture space, creatively. One example of this would be to place your focal point dead centre. Yet, this certainly isn’t the only option worth considering – think of the intersections of thirds and above and below the centre point too. You shouldn’t need to change your picture orientation, your camera to subject distance or your focal length for this technique. All that’s required for a complete re-interpretation of the subject is a subtle adjustment in the viewfinder!