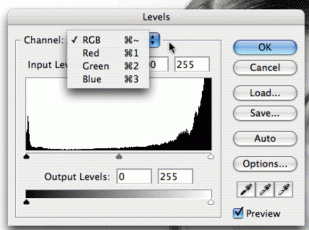
The Levels Palette: Page 2
 STEP BY STEP
1 Select Levels
With your image open, select Image > Adjustments > Levels. The Levels palette looks similar to the Histogram palette, and allows you to view each separate colour channel from the drop-down menu. For this exercise, keep the channel set to RGB.
2 The Outer Sliders
Three sliders run along the bottom of the graph. The left slider lets you increase the brightness of the dark pixels, the middle slider adjusts the midtones, and the right slider lets you darken the brighter pixels. Move the two outer sliders in towards the middle if there is no graph information at each end. A healthy histogram should have graph spikes at each side.
3 Midtone Tweaks
Now move the midtone slider to tweak the image, which should update live as you adjust it. When you have enhanced the overall composite image, you can move onto each colour channel.
4 Channel Menu
From the Channel dropdown menu, select a colour. The Histogram graph will change to illustrate the colour’s brightness value. With one eye on the main image, drag the sliders to the best positions to gain maximum enhancement.


