
Winter is arguably one of the worst times of the year for photography. Sure, you can get some great winter landscapes when the light is good, but more often than not we’re served with uninspiring and gloomy afternoons.
So what better time to set up a home studio? Sounds expensive? Not at all. Of course, you can spend a fortune on studio flash and backgrounds if you want, but you don’t have to. With home studio photography you can improvise not only in your choice of subjects, but also in your choice of lights and backgrounds.
In this article we’re going to focus on practical, low-cost techniques you can try, using items you probably already have in your home. The idea is to have some fun experimenting with new ideas and techniques, and to banish the mid-winter blues with some creative shooting.
 GETTING STARTED
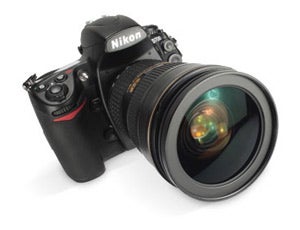
Camera
You can, of course, use any camera for home studio photography, a DSLR is by no means essential. However, there are a few features that will make life easier. A manual exposure mode will give you a lot more control over things like exposure and depth of field. You’ll also need to be able to focus fairly closely if you’re doing, say, small-scale tabletop photography. If you’re fortunate enough to own a camera with a PC flash sync socket, this will make life easier if you’re using flash too.
Tripod
This is an essential item for the home studio, especially for still-life photography. A tripod will enable you to fine-tune your composition, and will ensure sharper pictures, even at ‘hand-holdable’ shutter speeds. It will also enable you to shoot at long exposure times of many seconds or minutes, which opens your photography up to a variety of creative techniques.
Tabletop
If you’re doing still-life photography you’ll need a flat surface. A kitchen table, coffee table or any other flat-surfaced item of furniture is ideal, and of course this may dictate where in the house you have to work. If push comes to shove you can always use the floor, though this would mean spending a lot of time on your knees, which isn’t ideal from a comfort point of view.
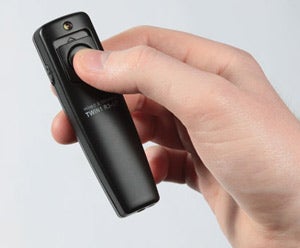 Remote Release
With long exposures, the act of pressing the shutter button can introduce vibration, which can reduce the sharpness of your pictures. A remote release not only eliminates this risk but can also allow you to fire the shutter while standing some distance away from the camera, depending on the type of release.
This means that if you’re working around a tabletop you don’t have to keep going back to the camera position to take a picture. Even for portraits a tripod and remote release will enable you to make eye contact with the subject and get a better rapport going than when your face is hidden behind the camera.
 Background
Regardless of the subject you are shooting there’s a good chance that you’ll need a background. Thankfully, with still-life this needn’t be very big and you have an infinite variety of options. Sheets of stiff card are ideal, you can buy them from graphic arts shops in many different colours. Perspex is more expensive but more durable and can be lit from behind.
In the right circumstances fabric also works well as a photographic background, white bed sheets and sheers of black cotton can be used, though they tend to work better as portrait backgrounds because the texture of the fabric may remain in focus on a still-life set taken shot with a small aperture, which can be distracting. With portraits, however, the subject is usually some distance in front of it so the texture is easy to blur using a wide-ish aperture. Another option that makes a great free-standing white backdrop for half-length portraits is to source an old projector screen. These can be found at car-boot fairs for pennies.
In portraiture you can sometimes dispense with a background altogether and use your house as a set. Pose your subject in an armchair or on a window ledge, and make the room part of the picture. Of course, the success of this depends on the room, and your furniture. This approach does tend to work best with uncluttered period or ultra-modern rooms.
LIGHT SOURCES
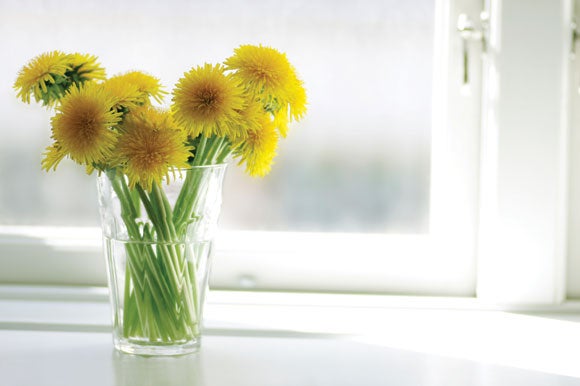
Daylight
By positioning your Object close to a window you can take advantage of natural daylight. A north-facing window will provide the most consistent illumination since you won’t get direct sun periodically making things difficult. The rule of thumb is that even, diffused light is best. Beggars can’t always be choosers though, so if your only option is a south-facing window you can diffuse it with net curtains or even greaseproof paper. If you have a conservatory this will provide a lot of light but it will be from all directions and difficult to control.
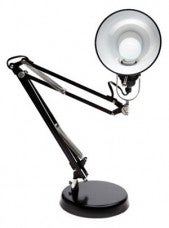 Domestic lights
Forget about the lightbulb that hangs from your ceiling as a light source, it’s very unflattering for both portraiture and still-life work. Desk lamps and, better still, anglepoise or spotlights are better as they offer direction and can be moved around to the ideal position. They aren’t very bright though, so you’ll be limited to a slow shutter speed or a high ISO.
Torchlight
If your subject is static, try using a standard pocket torchlight as a light source. Simply set the camera to Bulb, and move the torch around the subject over a period of several seconds until it has been evenly lit. See page 41 for more about this technique.
 Flashguns
A flashgun (or two) can be a great asset to the home studio photographer. They’re small, so ideal for confined spaces, and very versatile. Bounce them off a wall or the ceiling, or fire them through a diffuser such as a bedsheet. Some flashguns can be triggered wirelessly, while others can be fired using a cable or slave flash as a trigger. Although there is no modelling light, you can review and refine your efforts on the camera’s LCD screen.
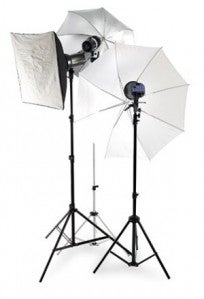
Studio Lighting
If you have a few hundred pounds to spare, the best option of all is to invest in a studio lighting kit. Studio lighting gives you more power, the ability to preview the effect of the light before shooting, and the system can also be modifed with a wide range of accessories. You’ll find that even a single light will greatly increase your options, but a twin-light kit is the ideal option.
USEFUL EXTRAS
 Reflectors
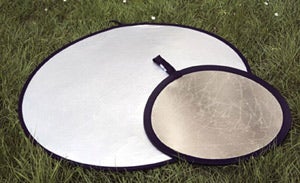
Reflectors are a versatile substitute for an extra light and can be very useful, if not essential for some situations. They come in all shapes and sizes as well as colours (typically white, silver or gold) and can be moved around to bounce stray light back into shadow areas, whether you’re shooting a still-life or a portrait.
Mirrors
Small mirrors, like those used for make-up or shaving, can be used as very concentrated reflectors on still-life sets, bouncing light into very specific areas as they don’t diffuse the light hitting them.
Blu-tack
What did we do before Blu-tack was invented? We use tons of this in our own product photography for holding things in place, raising the angle of a camera or lens, and you can also 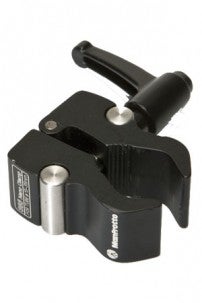 use them for holding those reflectors and bits of mirror, or fixing props in place.
Clamps
Some things are too heavy for Blu-tack, and that’s where clamps come in. A good clamp, such as Manfrotto’s Superclamp or Nano-clamp, can be used to hold lights, flashguns, backgrounds, big reflectors, boom arms or props such as bottles in place. No professional studio would be without a box full of clamps.
Black card
For the opposite effect to a white reflector, a black card is a handy tool for preventing fill light from hitting the shadow side of your subject. While the immediate use of such a tool might not be apparent, they can be very useful for removing all the light from dark shadows, often adding extra impact to a portrait.
Stands
Lighting stands give you something to attach your lights or reflectors to, and two together can be used to hold up a background. They’re height-adjustable too, making them very versatile. They don’t have to be expensive and can be bought second-hand on the cheap. It really doesn’t matter if they don’t match.