Setting Up Your Camera – Image Size/Compression
Image size / Compression
Within your menu you may also have a choice of image size and image compression. If you have chosen a JPEG format you may be offered a choice of Small, Medium, Large, Normal, Fine, and Superfine; in most cases it is best to choose the largest size and least compression – in this case, Large and Superfine – unless you know for certain that you won’t need the image any larger than for a website or email and you are short on card space. Only a few cameras offer compression and size options for Raw files but here the same rule applies.
How…
Most cameras keep their file format selection within the main menus. To make the process easy for you, we’ve shown how it looks on four popular cameras…
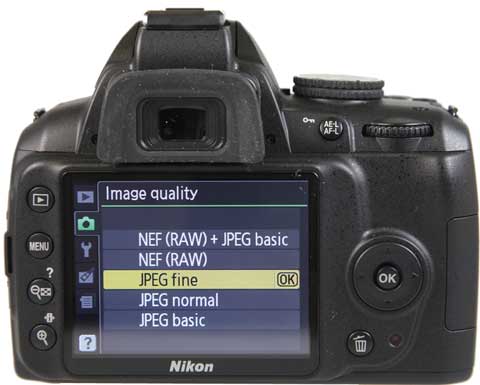
Nikon
The icon-based menu of most Nikon DSLRs is easy to navigate. Just look for the camera icon then select Image Quality, and make your choice.
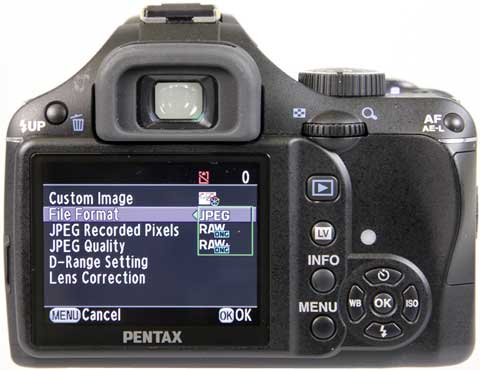
Pentax
Pentax also divides its menus into handy sections. In the file format menu you can choose from JPEG, Raw, and Raw plus JPEG options.
Sony
Sony’s menu system is divided into four main icons. The camera icon gives access to a Quality menu, which includes format and compression.

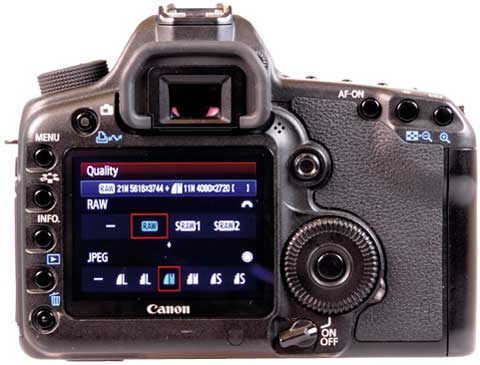
Canon
The slightly more complex arrangement on Canon’s 5D MkII gives plenty of options for dual format capture and levels of compression.