Philip Andrews shows you how to use the innovative new controls in Lightroom so you can convert a standard colour image to dramatic black and white
Software: Photoshop Lightroom or Adobe Camera Raw (ships with Photoshop)
Skills learnt: Non-destructive greyscale conversion
Time: 20mins
With the release of Lightroom and Adobe Camera Raw, photographers have been treated to various features designed to control and enhance their images in ways that hitherto were the stuff of dreams. Whereas in earlier versions of Photoshop we had to be content with a simple change of mode for greyscale conversions (Image > Mode > Greyscale), with these new programs there is far greater choice and much more control.
Gone are the simplistic controls that manipulated just the red, green and blue components of the image to be replaced with no less than eight hue sliders in the HSL/Grayscale panel. For colour images, this separation of colours means finer control of the Hue, Saturation or Lightness of each colour range. For photographers who love monochrome, the new colour groupings provide an extremely flexible method for creating custom mapping of the hues to greys. Using this control you can restore contrast to a greyscale conversion when the colours in the photo have translated to similar tones of grey, producing a low-contrast monochrome.
In this tutorial we will use the new colour controls and split toning options available in both Lightroom and Adobe Camera Raw (ACR).
Using Presets
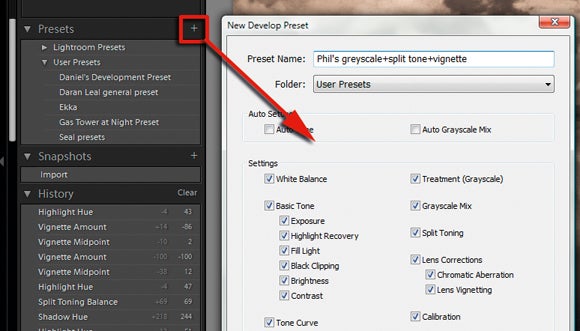
Don’t waste all the hard work you put into your conversions. After enhancing an image click the ‘+’ button at the top of the Presets pane to add a new entry. I included all adjustment controls, but you could choose just one, such as the Split Toning settings. Now by clicking on the new preset you can make the same adjustment changes to another image.
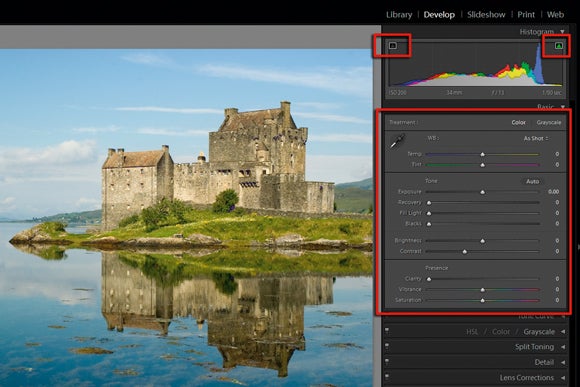
1 Import the file into Lightroom. I am using a JPEG to show how these programs can be used with non-Raw files. Using the Tone and Colour controls in the Basic pane, ensure that black and white points are set correctly and middle tones are distributed evenly. ACR users just need to right-click the file in Bridge and choose Open in Camera Raw.
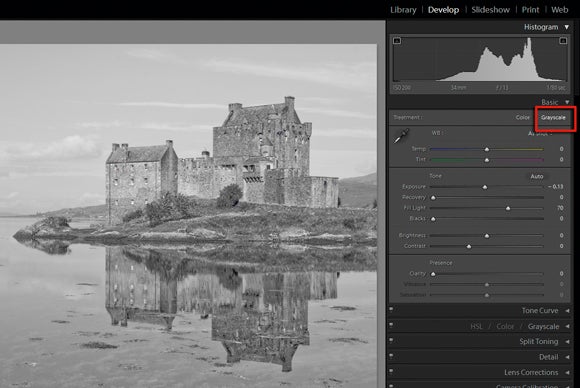
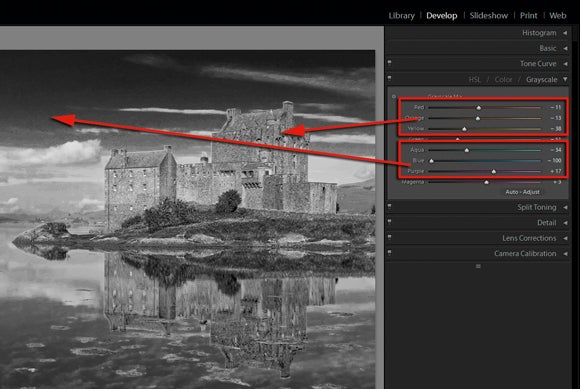
2 Next, move to the HSL/Color/Grayscale pane and select the Grayscale option at the top. This converts the image to monochrome using default settings. In ACR select the HSL/Grayscale tab and then pick the Convert to Grayscale option at the top of the pane.
3 Now for the fun bit. With the help of the colour sliders in the pane adjust the grey tones in the image to make the sky darker and the castle and clouds lighter. The Aqua and Blue sliders provided control over the sky area and the Orange and Yellow sliders isolated the castle colours. Moving the sliders to the right lightens the grey tones atributed to the colour. Dragging the slider to the left darkens the tones.
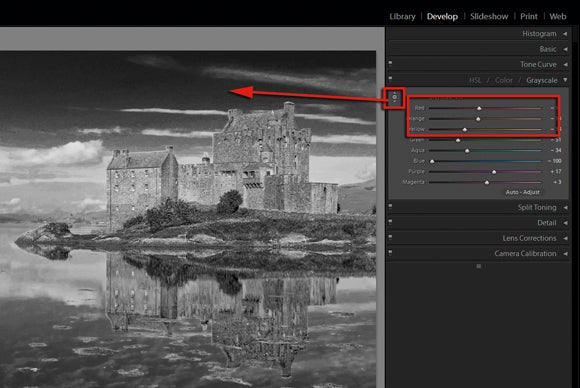
4 Lightroom users are able to tweak the grey tones directly with the mouse pointer. By clicking the small circle with a dot in the centre in the top left of the pane, Lightroom switches to the Targeted Adjustment tool. Now you can click on the photo and drag upwards with the mouse to lighten specific tones or downwards to darken them. Clicking the tool in the pane again switches the feature off.
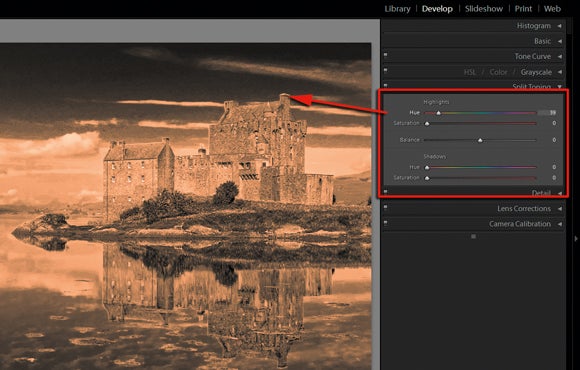
5 Now move to the Split Tone pane. This feature is designed to tint highlight and shadow areas different colours via separate Hue and Saturation sliders. Start with the Highlight Hue control. Holding down the Alt/Opt key while dragging the slider displays the tint colours at 100% saturation. Once selected adjust the Saturation control until the appropriate strength is set. Use the Balance slider to alter the ratio of highlight to shadow tint.
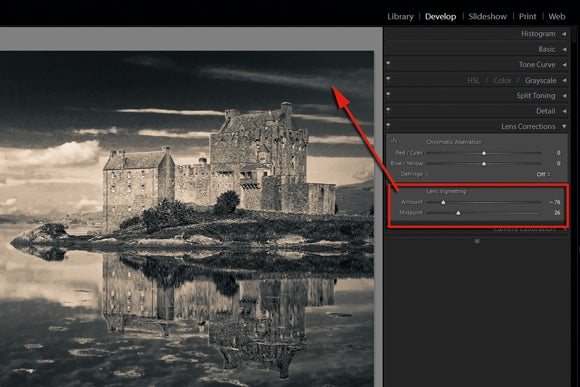
6 To add some more drama to the photo, move to the Lens Correction tab. Here we can use the Vignetting controls to add a creative vignette to the photo, rather than rather correct vignetting caused by poor lens construction. Drag the Amount slider to the left to darken the corners and then use the midpoint slider to control the size of the vignette effect.