You don’t have to be a portrait photography expert to take a passport photo. Citizens of many countries can take their own passport photographs in photo-booths or post offices, and have passport photo size prints inside ten minutes. In the UK and USA, these can cost £6-8 / $7-14 or more per set – which is to say per person.
A cheaper and fun alternative is to do the job at home. Some Photoshop magic can be sprinkled on your images – but only for the purpose of rendering an image passable – not to make you look great. And (optionally) printing on decent quality photo paper – at the regulation dimensions for a passport photo, of course.
Our money-saving guide shows you how to shoot your own passport sized photos quickly and easily at home…
You can also submit passport photos digitally; one no longer has to print the photos. It’s vital, though, to avail yourself of the rules set out by the government of your country, wherever you are. Check these sites for guidance for the UK and links for the USA before taking your own passport photos. Then follow our guide to get the best results!
Passport Photos – Official Guidelines
The criteria for eligibility are quite stringent, but easily achieved. A neutral expression with closed mouth, no red-eye, clear and sharp focus, with a plain cream/grey background, posed face-on to the camera, are all mandatory.
The photo should also have been taken in the last month – so you won’t be able to use an old photo that you happen to have on your computer.
There should be no shadows on the face, no hair in the face, no facial-coverings and, if printing on photo paper, the images must have no tears, creases or marks. Though official rules state you cannot wear anything that covers your head, there is an exemption if the covering is worn for religious or medical reasons.
The official rules state ‘no glare off glasses’, though if you wear glasses you’re probably best off just removing them entirely – you also can’t wear tinted glasses or sunglasses.
Guidelines for children
If you’re taking a passport photo of a young child they have to be the only person in the photo – you can’t prop them up in your lap. Official advice suggests that very young infants are placed on a plain light-coloured sheet and photographed from above.
The posing restrictions for children under 6, however, are a little less stringent – the child doesn’t have to look straight at the camera or maintain a neutral expression. Children under 1 also don’t have to have their eyes open, though if someone is supporting their head with a hand, that hand is not allowed to be visible.
It’s worth checking the guidelines on the official government websites as they can change: U.S. Passport Photos (state.gov), and www.gov.uk/photos-for-passports if you’re in the UK.
 How to take your own Passport Photos – Shooting
Background and positioning
Find a light-coloured wall (should be light grey or cream, not 100% white where possible) as a background and shoot your passport photo subject using the portrait orientation. It’s a lot like taking a very boring portrait photo.
Your surroundings are important and need to be neutral – for example, should you stand by something red it will have a luminescence that will reflect red light back onto you. Snapping in a random place won’t do – you have to specifically shoot for the right posed shot in the correct location. As much as a photobooth will happily do all this for you, avoiding the expense is the aim here.
You can’t use a photo that has been cut down from a larger photo, so make sure to position yourself or the subject so that they are completely filling the frame. The image of you, from the crown of your head to your chin must be between 29 and 34mm (while the overall height of the image is 44mm).
Lighting
Avoid using the flash as this increases the likelihood of red-eye and background shadows – however, if you can turn the flash down then a small pop of fill-in can provide good colour balance and open up facial detail.
Daylight is best, such as from a window, as this can provide as equal a balance as possible to avoid shadows on the face and background. Flat lighting is integral, as shadows over the face or background may cause your images to be rejected. Expose for the subject’s face, preferably using a spot or centre-weighted evaluative metering setting, and face detection, if your camera offers this.
When reviewing your images, ensure that they are well exposed – you don’t want underexposure, as the detail of the face will be lost in the shadows.
Take several photos to increase your chances of capturing a good image. Avoid smiling and blinking. You could even do this yourself if you use the camera’s self-timer and rest on an appropriate surface or, better still if you have one, use a tripod.
Make Your Own Passport Photos – Post-production
Avoiding post-production as much as possible is the aim of the game – in fact, images which have been digitally manipulated to change your appearance are not allowed.
Changing the background
If you can get away with a quick colour correction and exposure correction, then great. However, if the background of your passport photo image is a little dark or off-colour, it’s easy to use PhotoShop or Elements to fix the background, and make the subject stand out. Use the Magic Wand or Quick Select tool to select your background and simply press the delete key to remove it – ensuring the fill layer is a 5-10% grey as a totally white background is against the guidelines and will cause rejection.
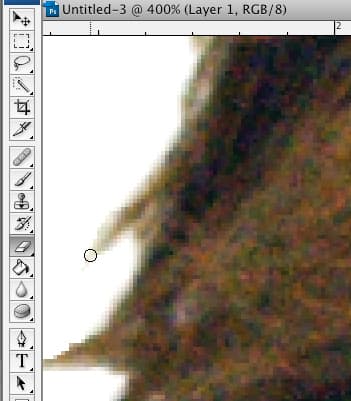
You may be left with some tricky areas around the hair, but these can be ‘picked off’ by zooming in and gently deleting (use the Eraser tool) offending areas or changing the tolerance of your selection tools and re-selecting specific areas.
Don’t worry about being too precise, as the image you are working on now is of a much larger size than the final print will be, so there is a lot of give in how much detail will be picked up in the final print. Once you’re happy select Layer > Flatten Layer.
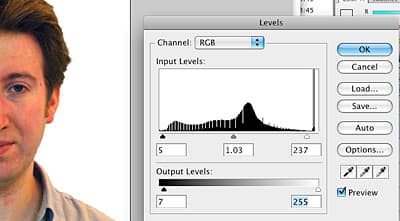
Make sure you have enough brightness to give the impression of being shot under bright light, like a flash. But don’t wash out details or blow highlights though.
You can bring up the Levels palette by going to Image > Adjustments > Levels. Now bring the left and right markers under the histogram towards the centre to increase contrast, and move the centre marker for brightness.
Rules for submitting digital photos
If you are submitting your photo digitally, then you don’t need to worry about printing one, and can simply upload your photo as part of the process of applying for the new passport.
The photo must follow the same rules as set out above, but should also be at least 600 pixels wide and 750 pixels high. The image needs to be at least 50KB, and no more than 10MB. You can control this easily when you save the image, by using Photoshop’s Export tool.
If you’re in the US, have a look at the government guidelines: U.S. Passport Photos (state.gov)
Can I use my iPhone or Smartphone to take passport photos?
If you treat your iPhone or Android smartphone as a camera and use the main camera on the back of the phone, and not the selfie camera, then you should be able to get a good photo that is suitable for passport photos. In fact, some of the guidelines specifically state: no selfies!
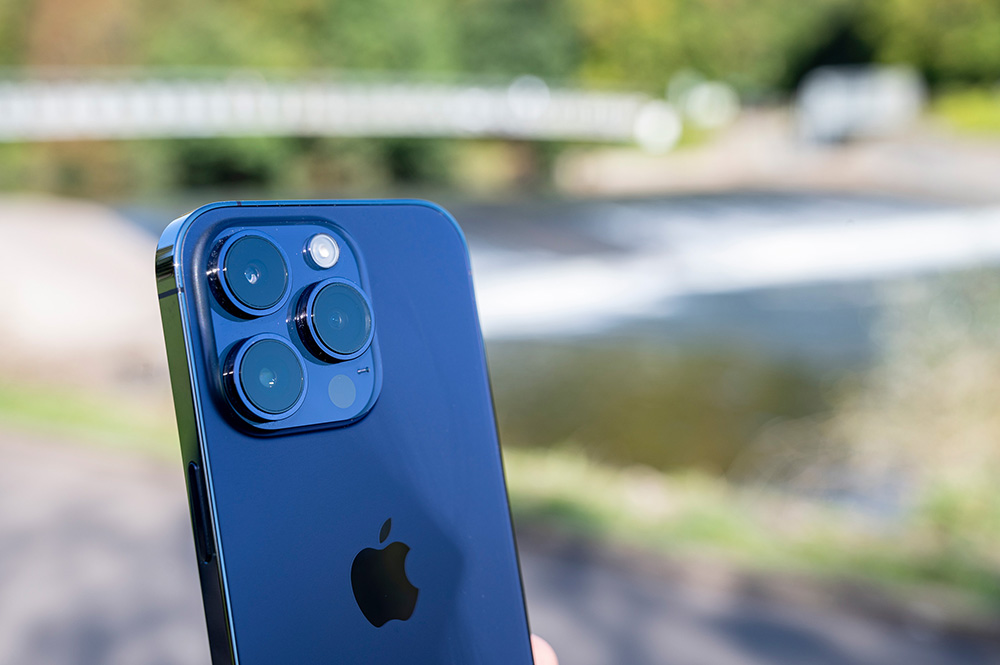
Therefore, we would recommend getting some help from a friend, and ensuring that you use some zoom if available to ensure you have a photo that looks like it was taken with a professional camera. Make sure that any filters, such as portrait or bokeh mode, are switched off, and that lighting is even. See our guide to the best smartphones for photography.
Make Your Own Passport Photos – Readying for print, photo size and dimensions
What size is a passport photo? Passport guidelines on passport photo size state that a passport photo should be 35mm wide and 45mm tall. Make a new file in Photoshop (File > New) at this exact size, at 300dpi.
Select your already edited image from the other window and, using the Move tool, click and drag into your new window.
If it’s too large use the Free Transform tool (Edit > Free Transform) whilst holding down the Shift key when dragging to resize to ensure correct proportion. You may need to zoom out to find the edges if it’s really big. The passport photo dimensions should now be correct.
Once you have your passport image fitted to the window, you’ll want to add a border and multiply the image.
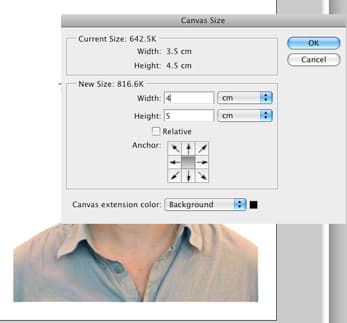
To remove any overlap outside of your 35x45mm window, then click Select > All and then Image > Crop, then hit D on your keyboard to restore your colour palette back to default. By using Image > Canvas Size it is possible to extend the border – add 5mm per side to make a 40x50mm (4x5cm) image.
To make your set of four images, use Canvas size again to double the width and height to 80x100mm, now Copy and Paste your image three times and use the Move tool to arrange them. Make sure they are copies as when applying for a passport it’s important to send a couple of identical images – there can’t be different poses in a single application.
Now flatten again into one layer (Layer > Flatten Image).
 Printing Your Own Passport Photos
Recent updates to the official rules for passport photos (GOV.UK) require that they are ‘professionally printed‘. This is something of a caveat to the process of home printing as is presents the possibility that your photos may be rejected by the passport office.
However, in the same document, it is made clear that photos should be printed on white paper and, although not suggested in the same document, in truth a decent quality inkjet printer with good inks and paper can effectively produce a professional-quality print.
Should you print your passport photos at home, ensure you use decent white photo paper, at the exact same size as onscreen (100%) and with the best possible resolution.
If your printer prompts you to resize to page or make any other changes then ignore these prompts. Once they are printed, use a ruler to measure each picture to ensure the size is still 35x45mm. Then cut them up with scissors and you’re all done – passport photos made at home on a budget.
Related articles:
- Complete guide to portrait photography
- How to take better portraits with a smartphone
- Get to grips with lighting for better portraits


