
Backwards USM for Better Contrast page 2
1 As sharpening changes are destructive, Elements users should start by opening a low contrast image then duplicating the background layer (Layer > Duplicate Layer). This way the changes can be made to the copy of the image layer rather than the original. Photoshop CS3 users can use the new Smart Filter option in the program.
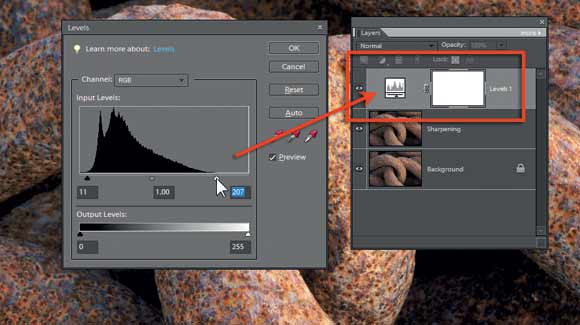
2 Set the contrast for the whole image, via a Levels Adjustment layer (Layer > New Adjustment Layer > Levels), dragging the black input slider to the right while holding down the Alt/Opt key until you notice the first clipped pixels. Do the same with the highlight input slider, dragging the control leftwards while holding Alt/Opt down.
3 To change the local contrast, choose Unsharp Mask (Elements: Enhance > Unsharp Mask, Photoshop: Filter > Sharpen > Unsharp Mask) and set the Amount to 0. Normally this would be set to a medium to high value. In CS3, convert the image layer to a Smart Object (Filter > Convert for Smart Filters) first before opening the filter.
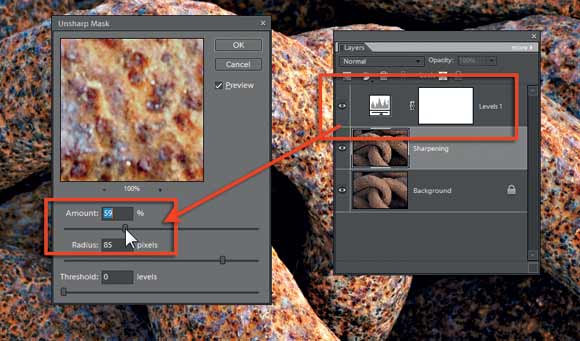
4 Next we will push the Radius slider towards the right side of the dialogue. Here I used a value of 85 pixels. Now, with the Preview option selected, start moving the Amount slider to the right. The value you set for this slider will depend on the level of contrast you need for the image.
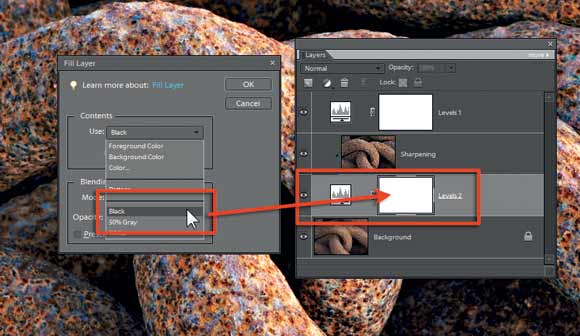
5 With some photos it is an advantage to be able to apply the local contrast changes to a selected area only. Photoshop users can achieve this by applying the change via the mask associated with the Smart Filter entry. Elements users need to add a second Levels adjustment layer with no adjustment settings just below the Sharpening layer. Now highlight the Sharpening layer and choose the Group with Previous option from the Layer menu and then select the mask of the second adjustment layer and fill it with black (Edit > Fill Layer).
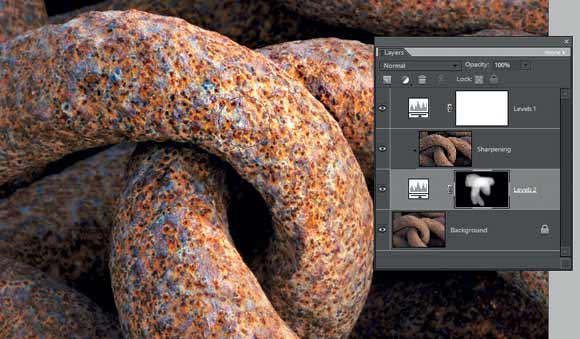
6 With the Levels mask now black and the adjustment layer grouped with the Sharpening layer, the effects of the local contrast changes are hidden. With the mask selected, choose a soft-edged brush and select white as the foreground colour, then paint onto the areas to be changed. By adjusting the opacity of the brush you can alter the strength of the change. If need be, apply the Unsharp Mask filter again to add clarity to the picture. This time use the Unsharp Mask filter in the usual way with the Radius slider set low and the Amount set to a higher value.