
There are various ways to remove or cover up unwanted detail in a photo. Here we look at how to apply the technique of retouching non-destructively.
Tools such as the Clone Stamp and Spot healing Brush have Sample All Layer or Use All Layer options. This means that you can add a blank layer above the background and use this layer to hold all of your retouching work.
Pro’s Tip: Keep in mind that when
you use a retouching layer, if you later want to alter brightness, contrast or colour you will need to make these changes via an Adjustment layer sitting above both the retouching layer and the original image layer.

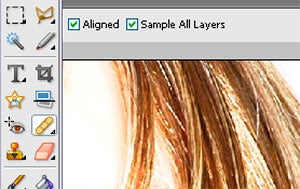
01 Retouching features such as the Clone Stamp, Spot Healing Brush and Healing Brush tools all contain a Sample All Layers setting on their options bar. Designed to allow the tools to retouch the contents of several layers, this option can also be used to protect your original photo pixels.
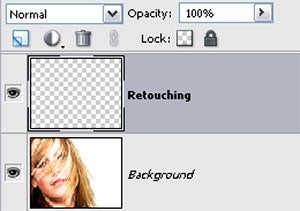
02 To make use of this option for non-destructive retouching firstly create a new blank layer above the image layer. Make this the active layer and then select the retouching tool and choose the Sample All Layers option. Now when you retouch, the changes will be stored on the newly created layer.
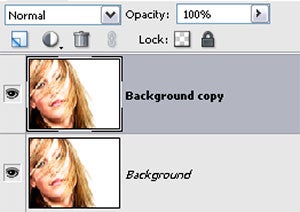
03 If the technique you are using can’t be applied non-destructively then make a duplicate of the image layer and make the changes to the copied image instead of the original. This also gives you the chance to adjust the strength of the changes with the layer’s Opacity slider.
In Photoshop:
Layer > New > Layer
Layer > Duplicate Layer
In Photoshop Elements:
Layer > New > Layer
Layer > Duplicate Layer