
This technique introduces a way to apply some vignetting to your photos without permanently altering the base image.
Many photographers, as a matter of routine, add some darkening to the corners of their pictures as they feel that this helps keep the viewer’s attention from wandering outside the boundaries of the photo. Some image makers use a big soft brush to paint in the vignette but here we will use a selection and the Levels Adjustment Layer to produce the same results non-destructively.

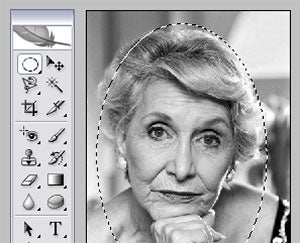
01 After selecting the Elliptical Marquee tool drag out an oval shape around the main subject area. The selection should include the parts of the picture that you don’t want to darken.
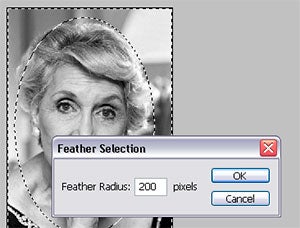
02 Next Inverse the selection (Select > Inverse) so that now the edges are selected and not the main subject. Now feather this selection (Select > Feather) to soften the transition between selected and non-selected areas.
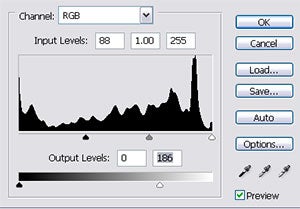
03 With the selection still active create a new Levels Adjustment Layer (Layer > New Adjustment Layer > Levels). This action will automatically produce a mask the shape and quality of the selection and link it with the Levels Adjustment layer. Now drag the black input slider towards the right and the white output slider to the left, to darken the edges of the photo.
In Photoshop:
Select > Feather
Select > Inverse
Layer > New Adjustment layer
In Photoshop Elements:
Select > Feather
Select > Inverse
Layer > New Adjustment layer