Applying a few simple effects in Photoshop can make a real-life image appear like a miniature model... How to apply pseudo-shift to your images using Photoshop
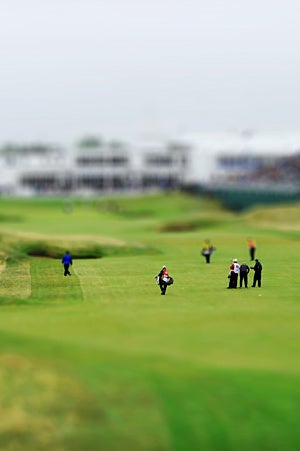 How to fake tilt-shift effects in Photoshop
Tilt and shift are two techniques that, for digital imaging purposes, refer to a particular lens’s ability to physically move in relation to a fixed digital sensor. It may sound a little bit confusing as to why you’d want to do this, but such technique traditionally offers the ability to adjust the angle of the focal plane to maintain focus across a given non-parallel angle, and adjust the line of sight to counter converging lines. Clever stuff.
Used in the right way it’s possible to make tall buildings’ converging verticals appear straight, even when the camera’s tilted, or to maintain focus of, say, a whole field of flowers from foreground to infinity. Used even more creatively, adjusting the focal plane can draw specific attention to detail or further enhance depth of field – a flashy effect often employed by professional food photographers. Go one step further and get a little more creative and it’s possible to make grand scenes appear like miniature models too.
Of course these lenses don’t come cheap; far from it. But even without the physical kit it’s possible to fake the miniature effect on appropriate photos using nothing more than Photoshop CS or above. We show you how…
Step by step:
Suitable images
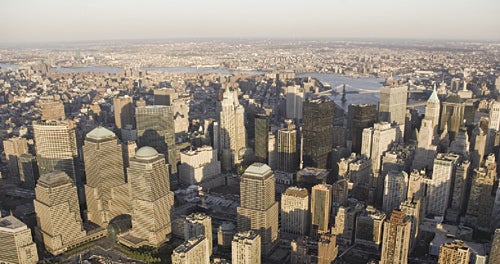
First thing’s first: you need an image – but not any snap. To fool your brain into thinking you have a miniature scene you’ll want to appear to be ‘looking down’. Shots from above are a good call. Wideangle shots may provide more isolated points of interest to use as a focal point later too.
Quick mask
In Photoshop, click the ‘quick mask’ option at the bottom of your toolbar, or hit Q on your keyboard as a shortcut. This allows you to draw on your image, with all selections appearing in red to indicate the mask selection. For a smooth transition we’ll use the gradient tool.
Gradient selection

Select the gradient tool from the toolbar (G on your keyboard), making sure your selected colours run from foreground to transparent using the ‘reflected gradient’ type. Click the focal point and drag out your selection in a line. This will create a ‘tubular’ selection. Hit Q again to make a quick selection of the quick mask.
Lens blur
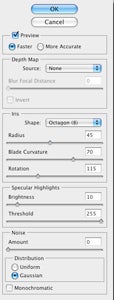
Select Filter > Blur > Lens Blur from Photoshop’s filter options. This will open a new window where you can apply pseudo lens blur effect. Ensure the Depth Map Source is set as ‘None’ to filter the layer itself. The Iris box provides radius and curvature options – the higher the radius the greater the blur, so apply as realistically as you care to tweak.
Additional fakery
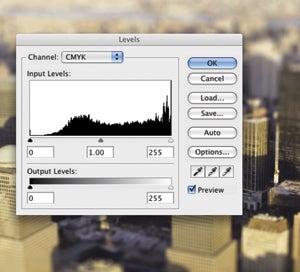
Miniatures aren’t made of ‘real’ materials, so grass may appear putridly green, while car headlamps may have a caustic glow. Using Levels, Curves, Hue/Saturation and a variety of Adjustment Layers from the Layers panel it’s possible to spruce up your fakery to look that extra bit unreal. Just don’t overdo it and blow highlights or oversaturate colours until they bleed. Subtlety on screen can convert to striking results on paper.
Tilt or shift?
We explain what the terms really mean…
Tilt allows the lens to rotate from a fixed pivot, thus changing the image plane in relation to a fixed sensor – it will no longer be parallel and therefore give the appearance of your focal plane (and depth of field) running at an angle ‘through’ the image. This is the effect mimicked for this tutorial. Horizontal tilt may be referred to as swing, which on old large format cameras could be performed on the film plane too for pronounced effect.
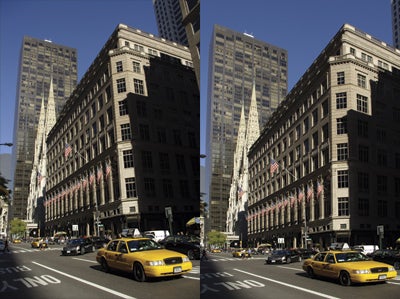
Shift is the physical vertical or horizontal movement of the lens, rather than rotation, which adjusts the line of sight – when the lens isn’t ‘face on’ to the subject vertical lines will appear to converge, but using the right amount of shift will give the impression of you being ‘higher or lower’ and counter convergence; resulting in a ‘front on’ shot, even if the camera’s at an angle. ‘Rise’ and ‘fall’ are other ways to express shift, though some cameras have the capacity to perform this on the ‘film’ plane (as well as the lens) for pronounced or extreme effects beyond what standalone lenses are capable of.


