
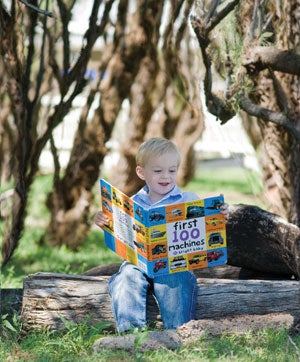
The new Content-Aware Scale feature in CS4 can be used to turn a landscape image into a portrait picture without making the subject appear tall and thin. Philip Andrews explains how.
With the new Content Aware Scaling feature (Edit > Content Aware Scale) in Photoshop CS4 you can now push and pull different image parts around the canvas and have Photoshop fill in the gaps. Yes it seems strange but it is now possible to move, stretch and resize different sections of your photo at varying rates. This is drastically different from the Free Transform command, which, when used in conjunction with the Shift key, always resizes all picture content at the same rate. Content Aware Scaling (CAS), which is also known as Seam Carving, changes all this.
The image is scaled by keeping detailed areas the same while up- or downsizing the parts of the photo that are featureless. CAS works with images, layers and selections in RGB, CMYK, Lab and Greyscale modes and at all bit depths, but not with Smart Objects, 3D or Video layers.
There are two controls in the tool’s options bar to help ensure that only the areas that you want to be squashed or stretched are scaled by the feature. They are:
1. Skin Protection (person icon): This setting attempts to prevent any skin tone areas in the image from changing during CAS actions.
2. Protect drop-down menu: This control provides a list of current alpha channels associated with the photograph. Selecting one of these entries will force the protection of the masked image parts stored in the alpha channel during CAS scaling.
This latter feature is particularly helpful if you are trying to get your picture to fit an oddly shaped photo frame, or if the composition is just a little off-balance.
Prepare the File
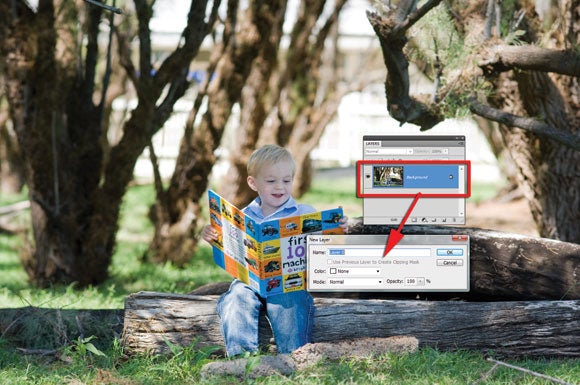
1. Just as is the case when using the Free Transform tool, if the picture that you want to scale is stored as a Background Layer, then you must first convert this layer to a Standard Image layer. Do this by double clicking the Background Layer entry in the Layers palette. Enter a name in the New Layer dialogue and click the OK button.
Scale the Image
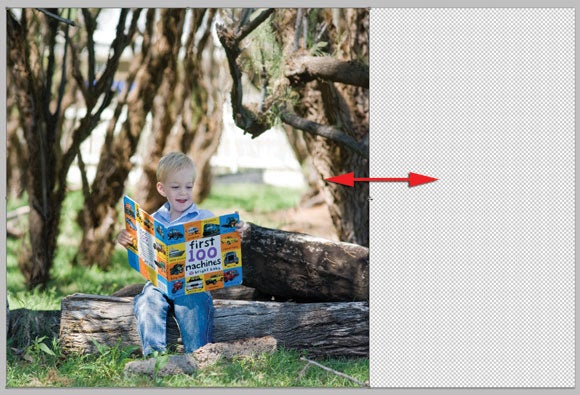
2. With the new layer selected, pick the Content Aware Scale option from the Edit menu in Photoshop CS4. Resize the image by click-dragging any of the corner side handles located around the edge of the photo. To apply the scaling either double click on the photo or select the Commit button (tick icon) on the tool’s options bar.
Refining the Scaling
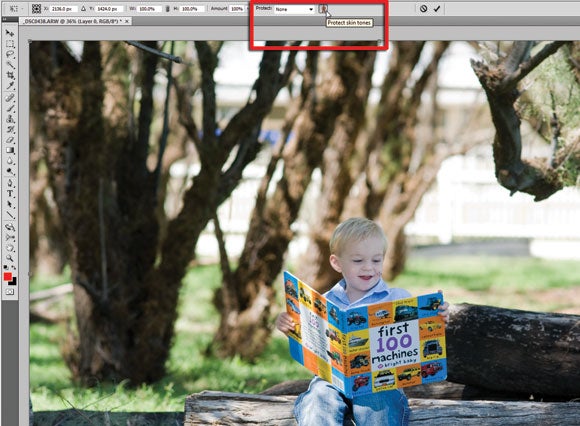
3. Some images scale well, but with others key areas are distorted. There are a couple of different ways to instruct Photoshop which parts should not be changed. One option for portraits is to click the Protect Skin Tones button in the tool’s options bar. This will help keep face and body areas from change but not necessarily clothes.
Mask Key Details
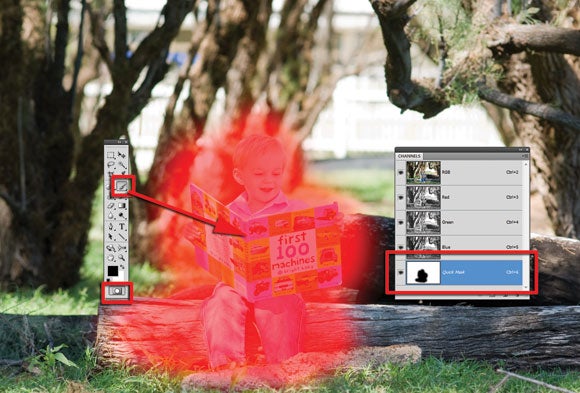
4. Another way is to mark out the parts to protect using a Quick Mask. Click on the Quick Mask button on the toolbar. Now press the X key to set the foreground colour swatch to black and the background colour to white. Select the Brush tool and paint over the area to protect the boy, the book and part of the tree in this example.
Invert the Mask
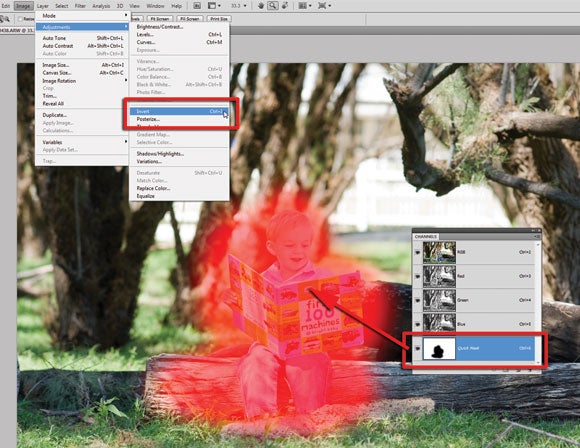
5. With the Quick Mask channel selected, invert the mask by pressing Ctrl/Cmd I or selecting Image > Adjustments > Invert. It will now cover the rest of the photo. You can avoid this step if you change the Quick Mask Options (accessed via the toolbar) so that the colour indicates the Selected rather than Masked area.
Scaling with a mask
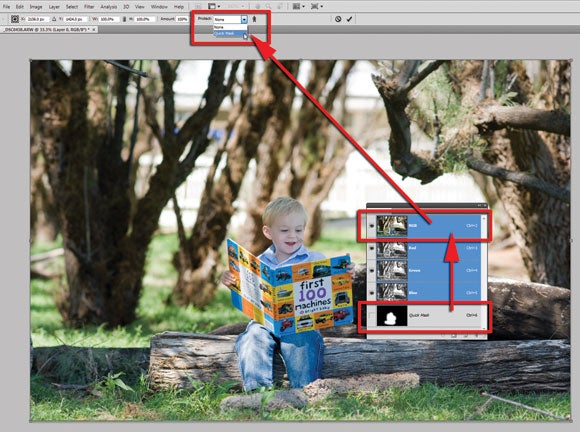
6. Scale the image using the Quick Mask by clicking the eye icon to the left of the entry in the Channels palette and selecting RGB. Now select Content Aware Scale from the Edit menu and pick the Quick Mask entry from the dropdown Protect menu in the tool’s options bar. Scale the image by click-dragging the handles.
 Pro Tip: Disguising Harsh Edges
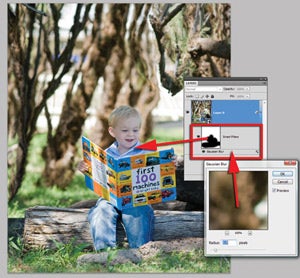
For modest resize and scaling the Content Aware Scale feature does a great job of seamlessly squishing or stretching less important picture pixels. However, when bigger changes are required, you may start to notice some jagged or stepped edges appear in the image. One good way to disguise these problem areas in unsharp parts of the picture is to paint on some extra blur over the jaggies. As this is CS4, we can do this non-destructively by converting the image layer to a Smart Object and then filtering it with the Gaussian Blur filter. Next, select the Smart Filter mask and hide the blur effect by painting onto the photo with a black soft-edged brush.
KEYBOARD SHORTCUTS
Edit > Content-Aware Scale – Alt Shift Ctrl C Invert a Quick Mask – Ctrl/Cmd I Reset to default foreground and background colours – X