
Actions are Photoshop’s answer to cutting down on dull, repetitive commands.
There are times when image editing tasks feel monotonous, especially when many commands and functions are repeated over and over again. Actions are Photoshop’s answer to cutting down on dull, repetitive commands. You can record a set of actions and then play them out on an image or a batch of images, while you sit back and watch.
For example if you wanted to sharpen an image, make it half the original size and save it in a different format, you could do this, while recording the process at the same time. Then, simply use the recorded set of steps you just performed to apply on another image.
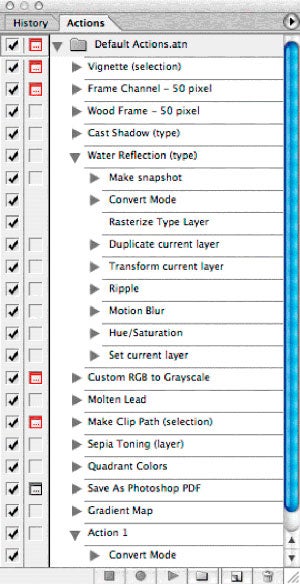
You can find the Actions palette from the Image Menu bar – select Window > Actions. From here you can use the controls to record, play and stop your new actions. The palette displays each command as you record them in a list. The list can be stored in a separate folder called Layer Set.
Actions can be edited and even deleted, either individually or as a set; just select the action you want to remove and click on the trash icon at the bottom of the Actions palette.
It’s worth noting that not all functions can be recorded; the brush tool, for example, will not be recorded as you paint on an image.
The Actions Palette Options
These options are found in the top right of the palette, by clicking on the arrow button
Action palette options give you greater control over the Actions palette by allowing you to customise recorded actions.
From here you can create an Action Set, in which it is possible to place a group of recorded actions into one single folder. This is particularly helpful if you want to apply actions to different categories of works, such as professional print, photographic or web production.
The palette options also allow you to load actions that you may have imported from elsewhere or even downloaded from specialist websites. You can even view the palette in button form with the ‘Button Mode’ option.
Follow these next steps to create a new action list:
Step By Step
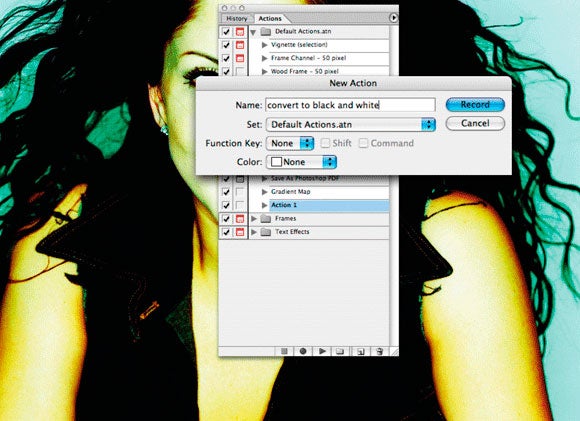
1 create New Acion
With your image open, select the Actions palette. Click on the Create New Action icon at the bottom of the palette. In the dialogue box, enter the name of your action list. Choose a name that is short and to the point.
Select the Record button.

2 Record the steps
As you carry out your desired steps, each command that you perform will appear in the action list as it is being recorded. Don’t worry if you make a mistake during a long series of stages, you can undo whilst recording or edit the action later.
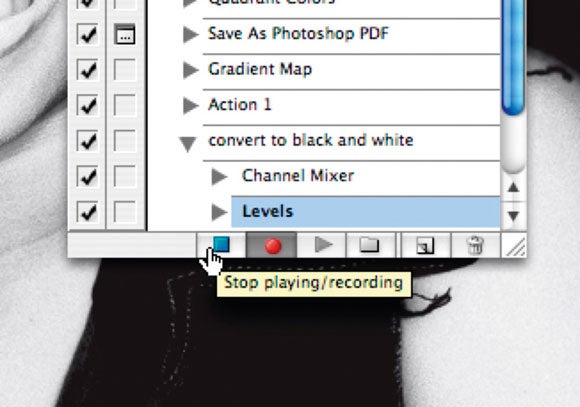
3 The stop Icon
When you have finished performing your enhancements, click on the Stop icon at the bottom of the palette. Your action recording will then stop, ready to replay. It’s a good idea to check the listed contents of the action in the Actions palette for accuracy first.
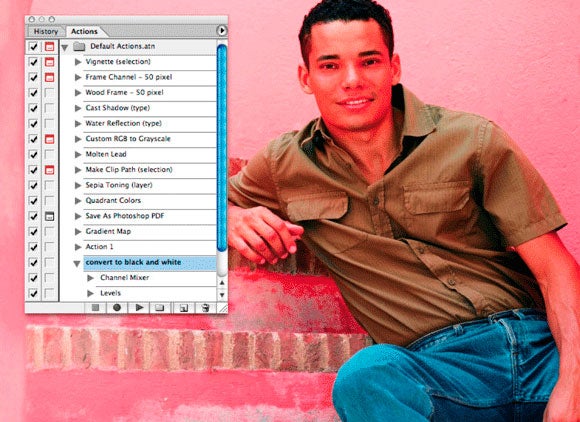
4 Apply Action List
You can view in sequence each recorded command from the action list. To apply this list of actions on another image, open your desired picture and select the name of your new action list from the palette. Now click on the Play icon and watch as the steps are replayed.
1 SET FOLDER
All recorded actions can be stored in these folders
2 DIALOGUE
Select this icon to view the action’s dialogue boxes
3 ACTION DISPLAY LIST
Displays the action title and the list of recorded commands
4 ACTION ITEM
Individual action steps can be hidden when this is selected
5 ICON MENU
Range of commands that can be accessed with one click of the icon
 Top Tips!
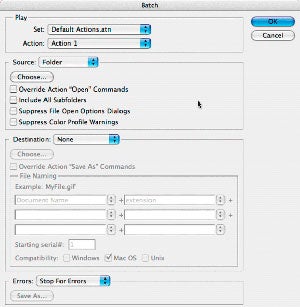
BATCH PROCESSING
As well as applying your set of actions to a single image, you can select a folder full of images and apply your actions to them too. This is called Batch Processing and can be a useful time saver when applying simple commands like resizing and saving as another file format. To use this function, select File > Automate > Batch from the Image Menu. In the first ‘Play’ section use the drop down menu to select the name of your action list. In the second ‘Source’ section make sure the drop down menu is set to Folder and click on Choose. Navigate your way through to your chosen folder of images. Click OK. The contents of the folder will now be processed automatically. If you want your images to be saved and closed, remember to do this as a recorded action otherwise the images will stay open for you to save manually.