
Controlling the colour in your photos starts when you select the scene and continues with careful capture control, but comes into its own when you get back to the desktop. Never before has the photographer had so much control over the hues in their images, with the latest versions of Photoshop, Photoshop Elements, Lightroom and Camera Raw containing a host of features that excel in colour enhancing. Over the next few pages we’ll look at some techniques you can use.
 Revealing hidden hues
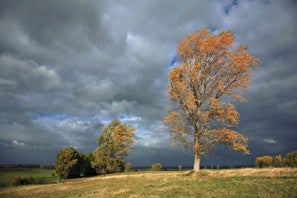
The colour of the light falling on a subject plays a crucial role in the type of colour that is reflected from its surface. It might be true enough for us to say that the leaves are a golden colour but these orangey hues may be less than vibrant in the photo as the picture was taken in the shade, or on a cloudy day, when the ambient light was quite blue. Adjusting white balance settings can reveal the colours that your own eyes saw but the camera failed to record.
STEP 1
Shoot in Raw for the best options for altering white balance. Adobe Camera Raw (in Photoshop and Elements) and Lightroom both contain dedicated white balance controls in the Basic panel of their development settings. If you haven’t captured the file in Raw and you have Photoshop CS3, you can open TIFFs and JPEGs into Adobe Camera Raw (ACR).
STEP 2
There are three ways to adjust white balance in ACR. The first involves selecting from the preset WB modes listed in the drop-down menu at the top of the Basic panel. Revealing the autumn colours might be as easy as selecting a different mode than the one used at capture. Selecting Cloudy or Shade will reduce the blue and boost the golden hues.
STEP 3
For more manual control, select the WB tool from the ACR toolbar at the top of the dialog. Locate a picture part that is meant to be neutral light grey, but is depicted as light blue, and click on it with the eye-dropper. Automatically, ACR measures the colours of the picture part, calculates how far from neutral they are, then corrects the whole image.
STEP 4
The last technique involves the Temperature and Tint sliders in the Basic panel. The Temperature control works in the blue-yellow range; the blue cast in the photo can be removed by dragging the slider to the right. The Tint slider adjusts magenta and green tones and is most often used for neutralising photos taken under fluorescent light.