Software: Photoshop Elements, Photoshop
Skills learnt: Using the Unsharp mask filter to increase the contrast of dull images
Time: 20 mins
Most digital photographers have used the Unsharp Mask filter as a way to add some crispness to photographs that are a little soft. In another application this feature can be used to add some local contrast to flat images in much the same way that multi-contrast printing provides a boost to black & white prints.
The trick with this technique is to forget the way that you have been using the feature. Instead of selecting a high amount and low radius setting, you do the opposite. You drag the amount downwards and the radius upwards. This produces a change in local contrast rather than a sharpening of individual pixels. To use the technique as part of your standard enhancement process you would adjust highlight and shadow points to set the contrast of the whole picture first, then employ the Unsharp Mask filter to increase the local contrast and then use the filter a second time, with different settings, to increase the photograph’s sharpness. With the aid of a layer mask these changes can even be applied to specific parts of a photo.
The Adjust Sharpness filter in Photoshop Elements, or Photoshop’s own Smart Sharpen filter, also contain Amount and Radius sliders which can be employed to produce similar contrast-changing effects.
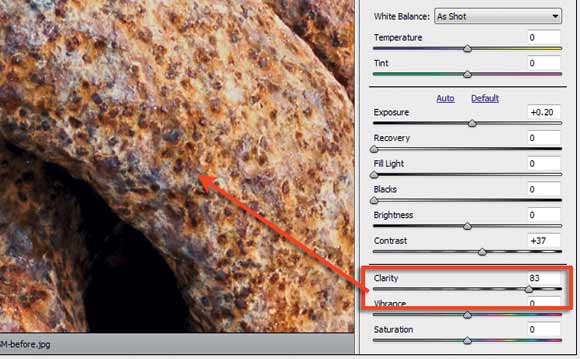
Other Software: Clarity Slide
The Clarity slider in both Lightroom and Adobe Camera Raw provides a similar local contrast adjustment that you can obtain with the techniques described here.