
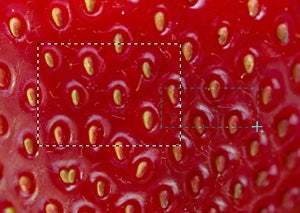
Being able to select well, is almost as important to a digital photographer as being able to shoot well. A u2018big callu2019 I know, but much of the craft of seamless editing is based on the quality of the selections you make at the beginning of the process.
With some complex images, no one selection technique will be able to isolate all the pixels required for your editing technique; instead, a combination of tools is needed to make the final outline. To aid with this, Adobe has included several selection possibilities in the options bar of the Photoshop Elements’ selection tools.
With these options, it is possible to ‘add to’, or ‘subtract from’, an existing selection or even use the ‘intersection’ of two separate selections as the basis for a third. Simply choose a different selection option when using a new tool. For those users who prefer to use keyboard shortcuts, holding down the Shift key whilst using a selection tool will add to an existing outline, whereas using the Alt/Opt key will subtract from it.
All of this may seem a little complex to start with, but it is important to persevere, as good selecting skills are critical for a lot of advanced editing techniques and, besides, after some practice, making multi-tool complex selections will become second nature to you.
Selection editing summary

Add to a selection by either holding down the Shift key whilst using another selection tool or clicking the Add to Selection button in the options bar.

Subtract from a selection by either holding down the Alt/Opt key whilst using another selection tool or clicking the Subtract from Selection button in the options bar.

Use the intersection of a new and existing selection to form a third outline by clicking the Intersect with Selection button in the options bar before making a new selection.

Modifying the quality of the selection edge
As well as being able to change the shape of existing selections by adding to, or subtracting from, them it is also possible to refine the characteristics of the selection edge.
By default when you create a selection the edge is hard and sharp. If you use the selection to isolate some changes you are making to a photo for example, there will be a distinct line where the changed area ends and the unchanged area starts. For this reason, Adobe includes a range of options for altering the characteristics of the selection edge.
The most well-known of these is Feather. This option smoothes the transition between selected and non-selected areas making the boundary between cha
nged and unchanged areas less distinct. Other options include Border, Smooth, Expand and Grow. These commands can be found as menu options in the Select and Select > Modify menus with Smooth, Feather, Contract, and Expand also located in the Refine Edge dialogue box.

There are two different View modes in the Refine Edge dialogue box – Marching Ants (left) and Ruby Lith Mask (right). Marching Ants is good to see the edge of a sharp selection and the Ruby Lith Mask is best used when feathering a selection to preview the quality of the softened edge.
Selection modification summary
Select > Feather adjusts the smoothness of the transition between selected and non-selected areas. Low values are used for sharp-edged selections and higher values for softer ones.
Select > Modify > Border creates a border of a specific pixel width at the selection’s edge. Add colour to this border using the Edit > Fill command. This option only creates soft edge borders. Use Edit>Stroke to create hard-edged lines around a selection.
Select > Modify > Smooth searches for unselected pixels within the nominated radius. If these areas are surrounded by selected pixels then they will be included in the selection; if the surrounding areas are not selected then they will be removed from the selection.
Select > Modify > Expand increases the size of the selection evenly by the pixel amount selected.
Select > Modify > Contract decreases the selection size by the pixel amount selected.
Select > Grow selects pixels adjacent to the selection that are within the tolerance range of the Magic Wand settings.
Select > Similar chooses all pixels throughout the picture that fall within the Magic Wand tolerance settings.

The Refine Edge dialogue
Refine Edge is accessed either via the button now present in all the selection tools’ options bars, or via the Select > Refine Edge menu entry. The dialogue brings together four different controls for adjusting the edges of the selection (Smooth, Feather, Contract, Expand) with two selection edge preview options (marching ants and red mask overlay).
These edge controls only existed previously as separate entries in either the Select or Select > Modify menu. Bringing them together in the one dialogue, and providing live preview options as well, means that the refining activity is a lot more accurate, as you are be able to see the results of the changes made to any of the controls reflected in the image itself. This is especially true when you are feathering a selection edge.